| *droooooool* |

For size reference, there's a sheet of standard notebook paper peeking out behind it on the bottom left. Yeah, it's huge. This baby is about 33 inches in diameter. That's almost a yard, people! @_@
I'm going to share with you how I made this. However, I made a STUPID mistake when making the actual star because it had been so long since I made my mock-up. When we come to that step, I will also tell you how to do it the way I had originally intended, which would have been easier than what I ended up doing. *sigh*
Click to see the tutorial!
You will need:
- 10 sheets of 12" square scrapbook paper (or have fun and use origami paper, or be thrifty and use newspaper...be creative!)
- Scissors
- Glue
1) Start with a square. Decide where you want your design to be visible. You're going to end up with only a thin kite shape. At first, it may be better for you to use a plainer piece of paper so you have an idea of how much of the design will ultimately be seen. Then you can use that as a template for your fancier paper. Fold it in half diagonally (along the long axis of your kite shape) and make a crisp crease. All folds, unless otherwise noted, are valley folds when looking at the wrong side of the paper, ie. when you make the fold, wrong side goes to wrong side.
 |
| The part I want to show is (kinda) what isn't covered by white paper. Now fold... |
 |
| ...like so. |
 |
| Fold like this |
 |
| It will end up like this |
3) Determine what end of your kite that you want to be wider; that point will end up towards the center of the star, and more of the design will be visible. Now go to the opposite corner and fold your sides to the crease you just made on the opposite side.
 |
| Fold like this |
 |
| And your paper will look like this |
4) Now we get to cut, and this is where I made my mistake. The way I actually did it, I cut along the lines marked in red.
 |
| Cut along the folds marked by the red lines |
 |
| See the extra flap marked in green? (it's toward the top center of the photo) |
The flap you cut (outlined in green) doesn't have to be exact; I would just make sure that it is smaller than the half of the kite next to it. Make sure when you cut, the flap is on the same side of all of the "spikes" you are cutting.
So by cutting the actual way, you end up with the image below. If you cut it the smart way, imagine that piece of paper in the picture with a flap coming off one side of the point further away from you.
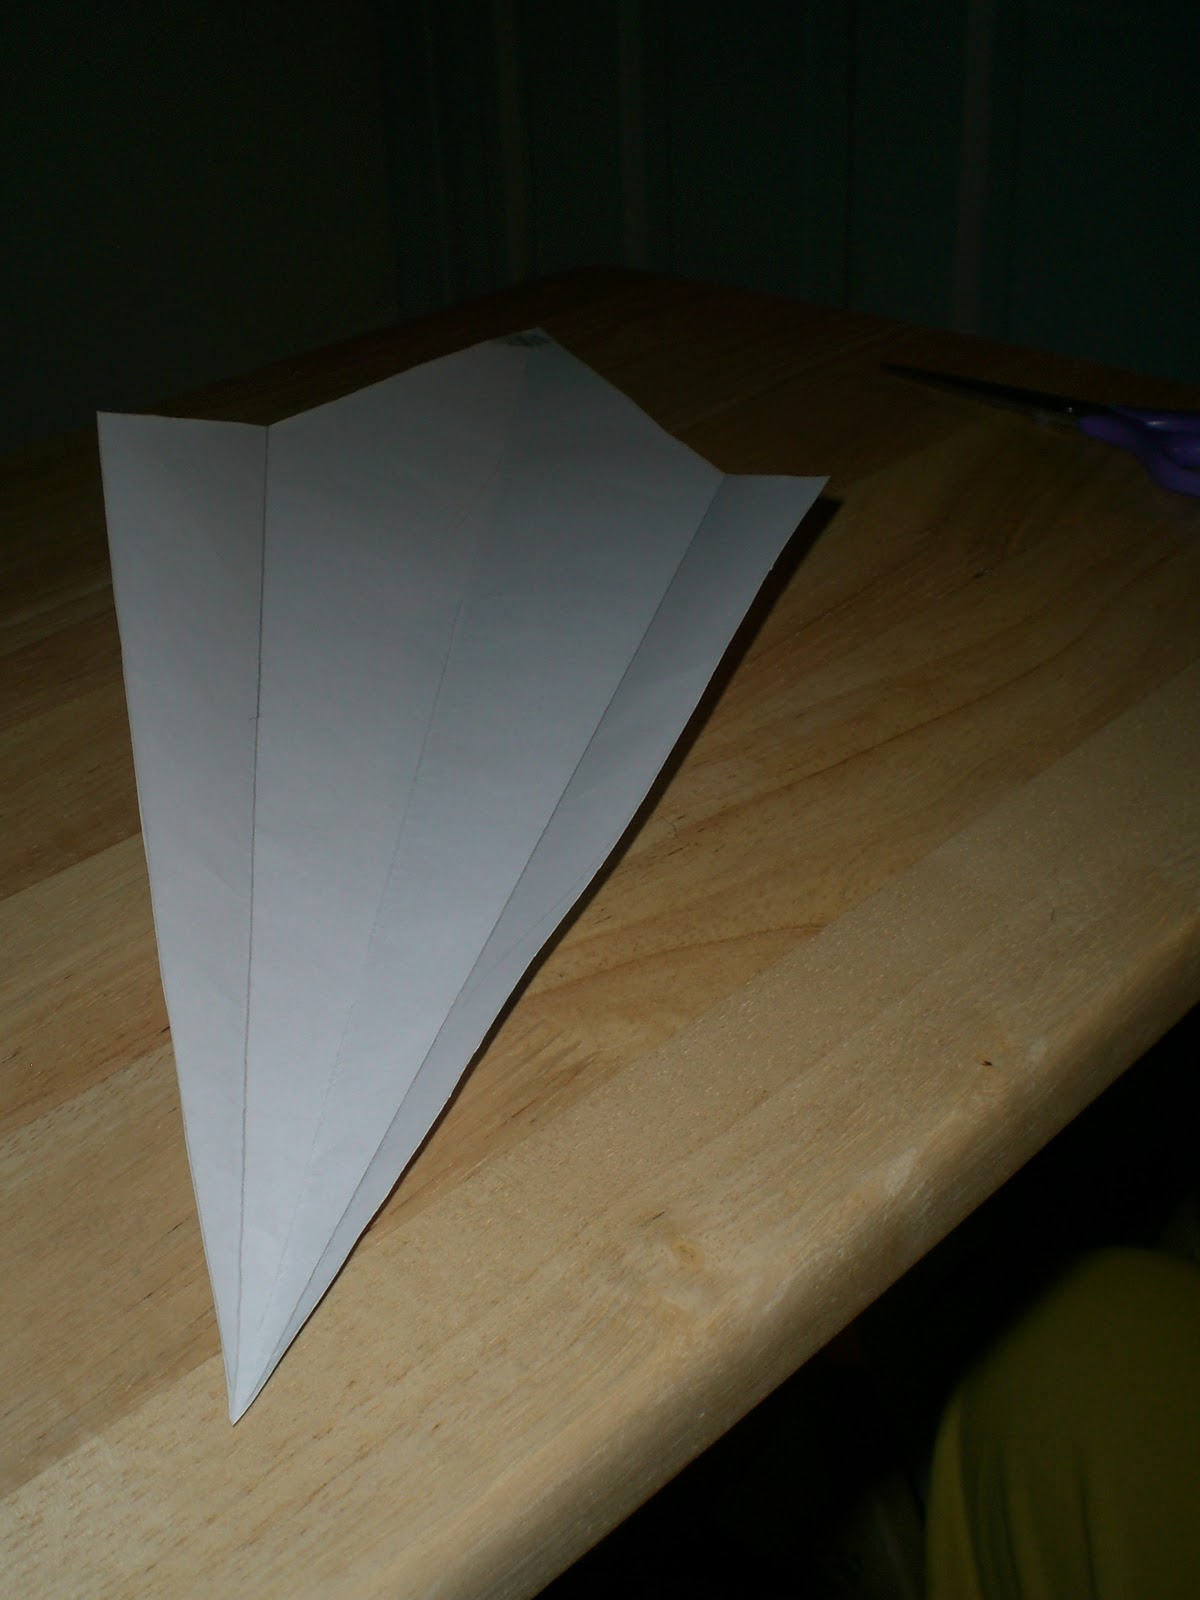
5) Take your spike and on one side of the narrow point, gently fold one edge to the nearest crease. Trace along that fold (make sure it's on the right side of the paper) with pencil or pen, then flatten your fold out again.
 |
| Fold, then trace |
 |
| It should look like this (I used a different piece of paper so the pencil would show up better) |
6) Repeat these steps for all 10 sheets of paper. Now, we get to glue! Fold your spike into a pyramid-ish shape so one edge meets the pencil you drew in step 5.
 |
| Kind of like this |
Glue in place. I used a piece of cardboard cut into a thin point and inserted it into the spike so I could press the pieces together more easily.
 |
| My cardboard piece |
 |
| Glue down... |
 |
| ...to make this |
Repeat for all of your spikes.
 |
| Awkward angle = awkward foot |
Ooh, pretty...
7) Arrange your spikes (with the wide points facing inward) until you are satisfied with your arrangement. Flip everything onto it's back.
 |
| I'm liking this arrangement |
8) Now is time for the final gluing. This is what cutting the flap would have made easier. If you chose to cut the flap, just put glue on the right side of the flap and attach it to the inside of the next spike. Continue around until you're done. And with that...you're done!
But if you do it the way I did it (sans flaps), you have a little more work left. When cutting your kite shapes out, you probably ended up with a bunch of pieces of paper that look like this.

At the narrow points, fold it in half to an even narrower point. Hold it next to your spikes and cut it so it is slightly shorter than the edges of the wide point. Open it up. (If you don't have those, just cut a narrow triangle that comes to a narrower point than the wide point of your spike and is about as tall as the edge of the wide point is long.)
 |
| Cut right about where my finger is |
Placing two adjacent spikes next to each other, with the edges of the wide point matched up, glue down your triangle.

Repeat for the whole star. I actually think this made the backside of the star look really cool, and if I can find out a way to keep this shape, I might make a star this way specifically to show the back. But anyways, here's what you have.
 |
| Looks cool, right? |
 |
| Ta-dah! |
Gorgeous!
PHEW. That was so long. Thank you for sticking with me! If you make one of these, please show me, I'd love to see it!
See you next time!
-Annie
Edit: Wanna see what I did with the scraps? (yes, I still had scraps even after needing those triangles to connect all the spikes) Go here to see how the Stingy Stitcher avoids massive waste of crafting material!
Shared at:
Thrifty Decor Chick


Good job, it turned out great! I never knew how to make one before, thanks for the tutorial!
ReplyDeleteThat looks pretty. I like the pattern coordination.
ReplyDelete