Showing posts with label Decor. Show all posts

Wednesday, March 25, 2015

Earring Organization

Well, well, well. One year without posts and here I am, breaking the streak.

Lots has been going in life, obviously. I'm finishing up medical school this May and finally going to be a DOCTOR. I start my training in Pediatrics this summer! In less than two months, I'm also GETTING MARRIED to truly the best man I know (and there will be a little DIY coming with that, believe you me).

But this is about crafting!

I just wanted to share this with you guys because I've never seen earrings stored quite like this. Putting chicken wire, or lace, or burlap in frames never really worked for me. They were all a bit too rustic, for lack of better words, for how I like to decorate.

I do, however, have a few of these scrolls hanging in my apartment:


It hit me when I saw these that I could imitate this style.

One trip to Michael's later and....


Pretty, no? I have been using this system for almost two years, and it's held strong for me. Hooks go near the top, hoops go on the edges (they of course also work really well on the bottom, and studs go near the bottom for easy unhooking.

Here's a slightly closer look at the top edge:


Also, this was almost laughably easy to make. I found a nice long piece of Aida cross-stitch canvas, a dowel (about 3/8" in diameter I believe), and red embroidery thread.

First I cut the dowel into two lengths, for the top and bottom. I pre-measured how many rows of canvas would be enough to make a casing for the dowels, then I back-stitched it in to emulate the look of a scroll. At the top, I also added a loop to hang it from.

Choose a spot, hammer in a nail (or hang a Command hook, whatever floats your boat), and put your earrings in. Done!

Thanks for reading, especially to those of you who used to follow my blog and remained faithful followers! Hopefully I'll poke my head in again soon to share some of my wedding DIYs with you!

- Annie

Wednesday, December 11, 2013

A Little Holiday Spirit

As always, it's been a quite a while since my last post. I hope I find you all well and in the midst of a lot of holiday excitement!

My year, suffice to say, has been extremely busy. Without spending too many words on it, I'd just like to say that this is probably the most challenging time of my life, although it can also be incredibly rewarding. Third year of medical school is exhausting but also fun at times! If anyone is interested in a post talking more about what my year and experience has been like, I'm happy to share, but otherwise, I'm keeping this more in the spirit of a crafting blog.

And despite the demands that have been put on me this year, I have still managed to find a little time here and there for crafting! Shocking, I know. I'm hoping there will be time later on to share my other projects, but it'll just be one today.

So I moved recently, and my living situation now is such that I know I'll be here for at least two years. That is the only explanation I can come up with to explain why I had a sudden urge to actually put up any sort of Christmas decorations this year. Something about the slightly more permanent living situation made me want to "take ownership" of my apartment in some way. Somehow, putting up seasonal decorations does that for me, I guess, even though I've really never been a "holiday spirit" kind of girl!

I had originally thought that I wanted to craft those little cone-shaped Christmas trees you're seeing everywhere, or maybe crochet up an adorable Christmas lights garland. We don't really have the space to store a large amount of seasonal decorative stuff, so I was thinking small.

However, I had also noticed that a lot of our neighbors are putting up Christmas wreathes. And somehow deep down inside, I felt this "keeping up with the Joneses" sense of inadequacy suddenly well up, and then I decided right there to make a wreath for our door!

A quick trip to Michael's and an hour or two later and....


Ta-da! Isn't it cute?


All it took was a foam wreath form, a couple tinsel garlands I bought last year (whoooo, post-seasonal clearance!), some ribbon, a decorative little "sprig", and some wire.


A foam wreath form is a great base because it's so easy to get stuff to stay in. Simply use some wire (you can use the "U-shaped" floral pin things, unbent paper clips, even some nice heavy staple gun staples) to anchor the ends of your tinsel and wrap, wrap, wrap. Make sure it's luxuriously dense and fluffy!

When you're done with that, wrap your ribbon around, anchoring it in a similar way. Don't wrap it too tight or you'll crush the tinsel, and that just looks weird.

I made a bow by hand by making three larger loops, then using the central loop to cinch them all together. The nice thing about a lot of crafting stores is that they'll have bows coordinating with a lot of their holiday ribbons premade for you if you don't feel like making one on your own. Either way, pin the bow onto the wreath as well.

As for the green "sprig", all I ended up doing was stab the stem into the form as well. Seriously, foam is magic, I love this stuff.

Lastly I created a hanging loop with a longer piece of wire bent into a U. I found the point that I wanted to be the top of the wreath and starting poking the ends of the U into the foam, pointing it upwards. When the wire was about halfway in, I then bent the remaining exposed wire up to create a simple loop.

Et voila, you are done!


The sparkling in these images makes me ridiculously happy. :) And we now have an adorable wreath and I no longer feel drab next to our neighbors!

I've seen a lot of very creative wreath ideas out there. Ornament wreathes, crocheted wreathes, succulent wreathes, yarn-wrapped, burlap, pompom, the list goes on and on. Have any of you created your own wreathes? Anyone have other fun ideas with what you can do with a tinsel wreath as a foundation?

Happy holidays! Hopefully you will hear from me again soon!

Thanks for reading!

-Annie

Shared at:

Tuesday, June 4, 2013

Tape and Smartphones

Hi all!

Test day will be upon me very very soon. At this stage it's reached the point where I really just want it to be over and done with. Soon!

Just a quick post to show off what I do with some of my breaks. 

I assume by now that most of you are familiar with washi tape. I thought it was cute, but kind of silly to blow money on...but really, this stuff is super fun. :D

First, in the course of studying, I wanted bookmarks. It just so happened that I had rediscovered How About Orange (super-fun blog, highly recommended!) and found this tutorial for a heart-shaped corner bookmark.

Whipped up two super-quick with some notebook paper I had on hand. Unpleasant surprise: they didn't stay flat and folded as well as I had hoped. And of course they weren't exactly pretty. But with a little tape to hold things together...


Cute! Far from perfect, you can even see the notebook paper lines on the chevron one, although I do think it's cool that the lines almost matched the peaks. :)

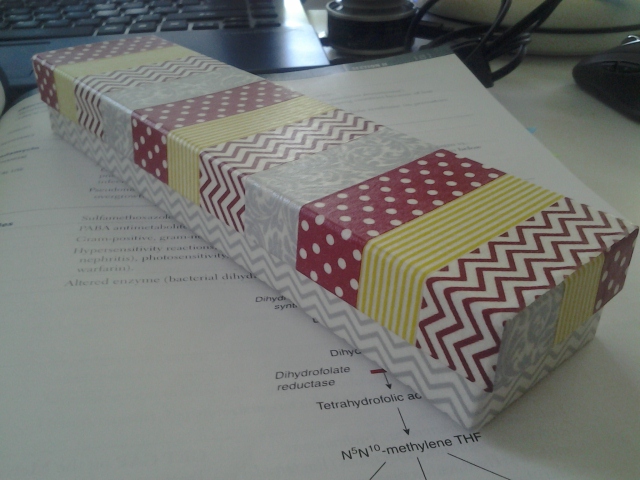
It just so happens that I had recently found this tutorial for a washi tape-covered box, and even had one of those white necklace boxes just laying around. So when I had a mini-meltdown around lunch, I did this to cool myself off:


Prettified!

The rest of my possessions had better watch out, they're about to get WASHI'ED, muahaha!

Final note before I toddle back to my flashcards: did everyone else already know that there's a Blogger smartphone app? All you have to do is search Blogger in your app store and it comes up!

To tell the truth, I could immediately tell that there would be some problems with it. You don't have a lot of freedom in formatting on the phone, and I find typing on my phone downright annoying sometimes. But the reason why I got the app was that now, I can take pictures on my cell phone and immediately upload them and save as a draft! No more excuses! No more waiting until I've charged my camera or found the energy to connect my phone to the computer and upload photos!

Maybe this will up my posting frequency, who knows? I love technology, guys. :)

Welp, that's it for now! Until after Step 1, my friends!

-Annie

Sunday, November 4, 2012

Commitment Day 4: Afghans


It's Day 4 of my 30 Days of Commitment series! See other posts in this series here.

Yikes, exams are this week! A lot of posts this week will be pic-heavy with hopefully less rambling than usual!

I was about a month into the "learning to crochet" process when I saw the concept of a chevron afghan in a magazine somewhere. The concept was easy (skip a stitch at the "valley", increase a stitch at the "peak"), so I boldly purchased a few skeins of Simply Soft Caron Eco and got to work!

Four years of extremely intermittent crocheting later...

Featuring a guest appearance by Cabbage the panda,
Pancake the polar bear, and Blackjack the dapper black bear.

Before y'all judge me too hard for taking this long, consider this. Lacking any real crocheting experience, I made a fatal miscalculation in the design of this afghan.


It's in single crochet. You guys. This thing is a beast. It's so dense and heavy. It takes forever to add to its length. It's eating up so much yarn. OMG.


See that? That's a page of notes I made when determining the size of this blanket. Its finished dimensions will be about 4.5 feet by 5 feet (currently it's about 70% done). And this thing is going to take 30 skeins of yarn.

*dies*

Someone with afghan-making experience, tell me: is this normal???

Anyways, in my infinite wisdom, I also decided to start a granny blanket last spring. Here's my progress so far, minus a few I have in my carrel at school. I work on those when I have time to kill there and I'm not in the mood to study.


I'm currently going with this configuration. My working plan for these requires almost 150 squares. Yahoo? It'll be about 5.5 feet wide and about 6.5 feet long.


I'm still not sure how I plan on joining these up. Experienced crocheters, do you have preferred joining methods?

Thanks for tuning in, guys, and wish me luck on my tests!

-Annie

Shared at:

Tuesday, June 28, 2011

Origami Roses

Greetings all! I'm back with a quick project I worked on about a week ago.

That is, it was supposed to be a quick project...

Do you remember this photo, from my turtle history?


I made these roses from construction paper for Mother's Day two years ago, using this tutorial. By now, sitting by that window has faded them to this:


Crazy!

So my mom asked me if I could redo them in something that will keep its color. My first thought was origami paper. Her first thought?


This is the same shiny stuff they wrap around poinsettia pots in the holiday season. It's pretty to be sure, but I'm warning you now, it's a bear to work with.

A paper rose might take me ten minutes. Might. Lots of pre-creasing.


However, these beautiful foil roses?


Each one took over an hour.

The problem with these is they don't stay when folded. They crease easily, but it won't stay put! I had paper clips hanging all over the place during the shaping steps, until I could lock the darn things in place.

But really....


SO worth it. They're gorgeous.

Now the white rose, of course, hadn't faded, only the pink and yellow had. But my mom was thinking, "Well, won't that one matte rose look odd against all that shiny-ness?"

She looks at me and says, "Why don't you try aluminum foil?"

I surprised to find out that the aluminum foil rose was significantly easier. The folds actually stayed in place (better than paper, actually); the only problem is that in both aluminum foil and the foil paper I had, it's difficult to reverse a fold (you know, make it fold the other way)...the foil doesn't like change, I guess.

But again...


TOTALLY WORTH IT.

Aren't these just beautiful? I am seriously considering screwing all gender stereotypes and making a bouquet of these for my boyfriend next Valentine's Day. Just so I can do it.


SO PRETTY. I'm a little obsessed.

Again, if you'd like to make these, the tutorial can be found here. Once you get the hang of it, it's quite easy. After two roses I could do it from memory. Please show me pictures if you try it!

Edit: Okay, so, um, ridiculous story. How many of you are familiar with the blog Inside Out Style? It's this really fabulous style blog by Australian image consultant Imogen Lamport. She has all these great posts that always focus on finding what is best for you. You'll see in my list of blogs I follow that I do read a few fashion blogs (it's one of my new interests), but I just don't talk about it much. But I have to say, Inside Out Style is one of my favorites because it's so practical and applicable to me.

So why did I mention this in the first place? Well, Imogen has a feature called Weekend Reading, and guess what link popped up there?

OMG YES. THE LINK TO THIS VERY POST.

Sorry, I'm just blown away that someone so "high and mighty" in the blogging world would have even noticed something written by me. It's exciting, and such an honor! :) Thank you, Imogen! Please visit her blog and/or take a look at the other bloggers in this week's Weekend Reading!

-Annie

Shared at:


NightOwlCrafting


Friday, October 8, 2010

On a roll!

Haha, so somehow in the past week I have managed so many posts! I have no idea why or how, it just happened! So today's is really short and sweet, just two small things with simple instructions if you're interested.

First up is my new camera case in a REALLY bright purple (Simply Soft Collections Grape, I believe). I messed around with it for a couple hours before I settled on a stitch and design I liked.

Ta-dah!


Also, remember that star I just posted about? Well I took this boring old clock we had and changed the face to a little patchwork of my scrap paper! Wouldn't it have been a shame to toss out all those huge pieces of lovely paper? Here comes Stingy Stitcher to the rescue!

From blah...

...to cute!
 All I have to do is figure out a pretty way to indicate where the numbers are. I'm thinking dots, or maybe number stickers. Any suggestions?

Click if you want to see the camera case pattern!

Thursday, October 7, 2010

Crazy cool paper star

So ever since I saw this beautiful sunburst on Craftster, I have wanted to make one myself.

*droooooool*
For lack of a tutorial from its creator, I set out to make one for myself. It's not the neatest up close and it may not have been the most efficient way to do it, but I think it came out looking AWESOME.


For size reference, there's a sheet of standard notebook paper peeking out behind it on the bottom left. Yeah, it's huge. This baby is about 33 inches in diameter. That's almost a yard, people! @_@

I'm going to share with you how I made this. However, I made a STUPID mistake when making the actual star because it had been so long since I made my mock-up. When we come to that step, I will also tell you how to do it the way I had originally intended, which would have been easier than what I ended up doing. *sigh*

Click to see the tutorial!