Showing posts with label Crochet. Show all posts

Tuesday, December 4, 2012

Coming out of my shell...

Guess what I've been up to since my last post?


TURTLES!!!


I posted way back when about all the turtles I had made previously using the Tiny Striped Turtle pattern.


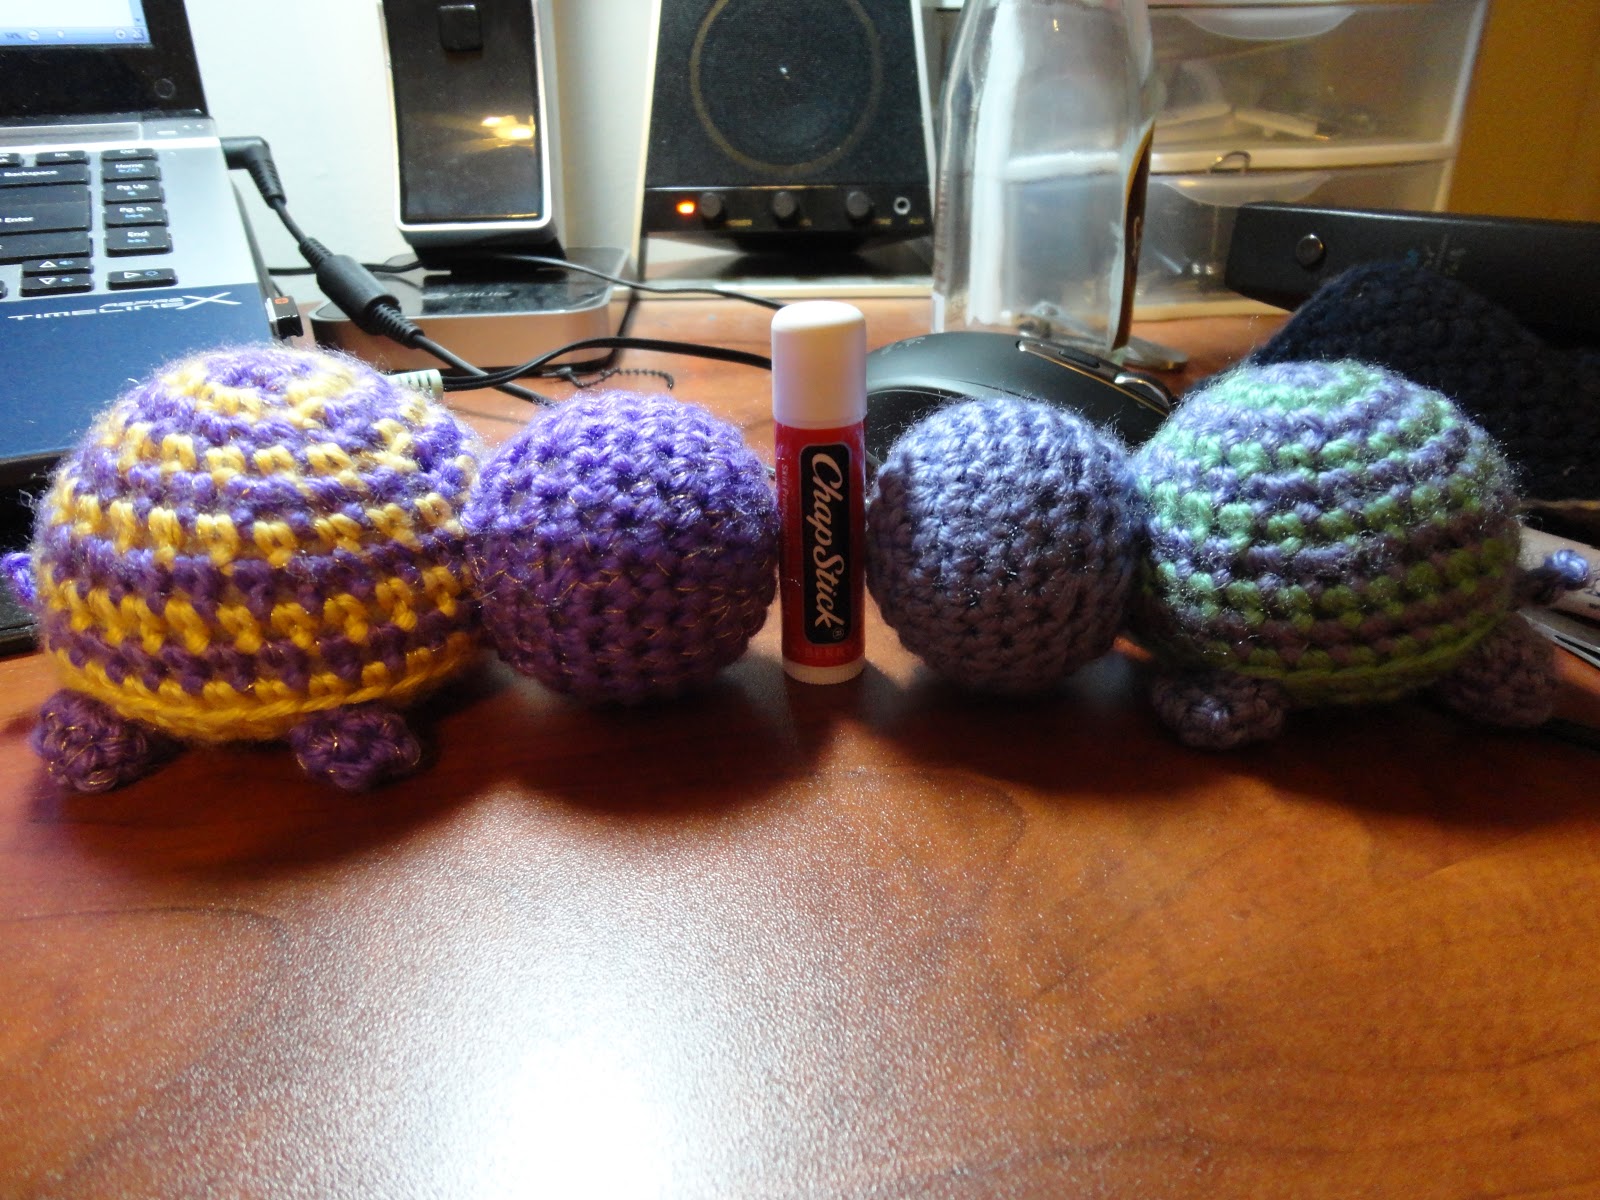
Since then, you may vaguely recall a post last from earlier this year with this picture:


Those were the first two turtles I made out of this "collection". The intent was originally for them to be last year's Christmas presents to some of my friends here at med school.

Clearly that didn't quite work out.

"We're blind!" D:

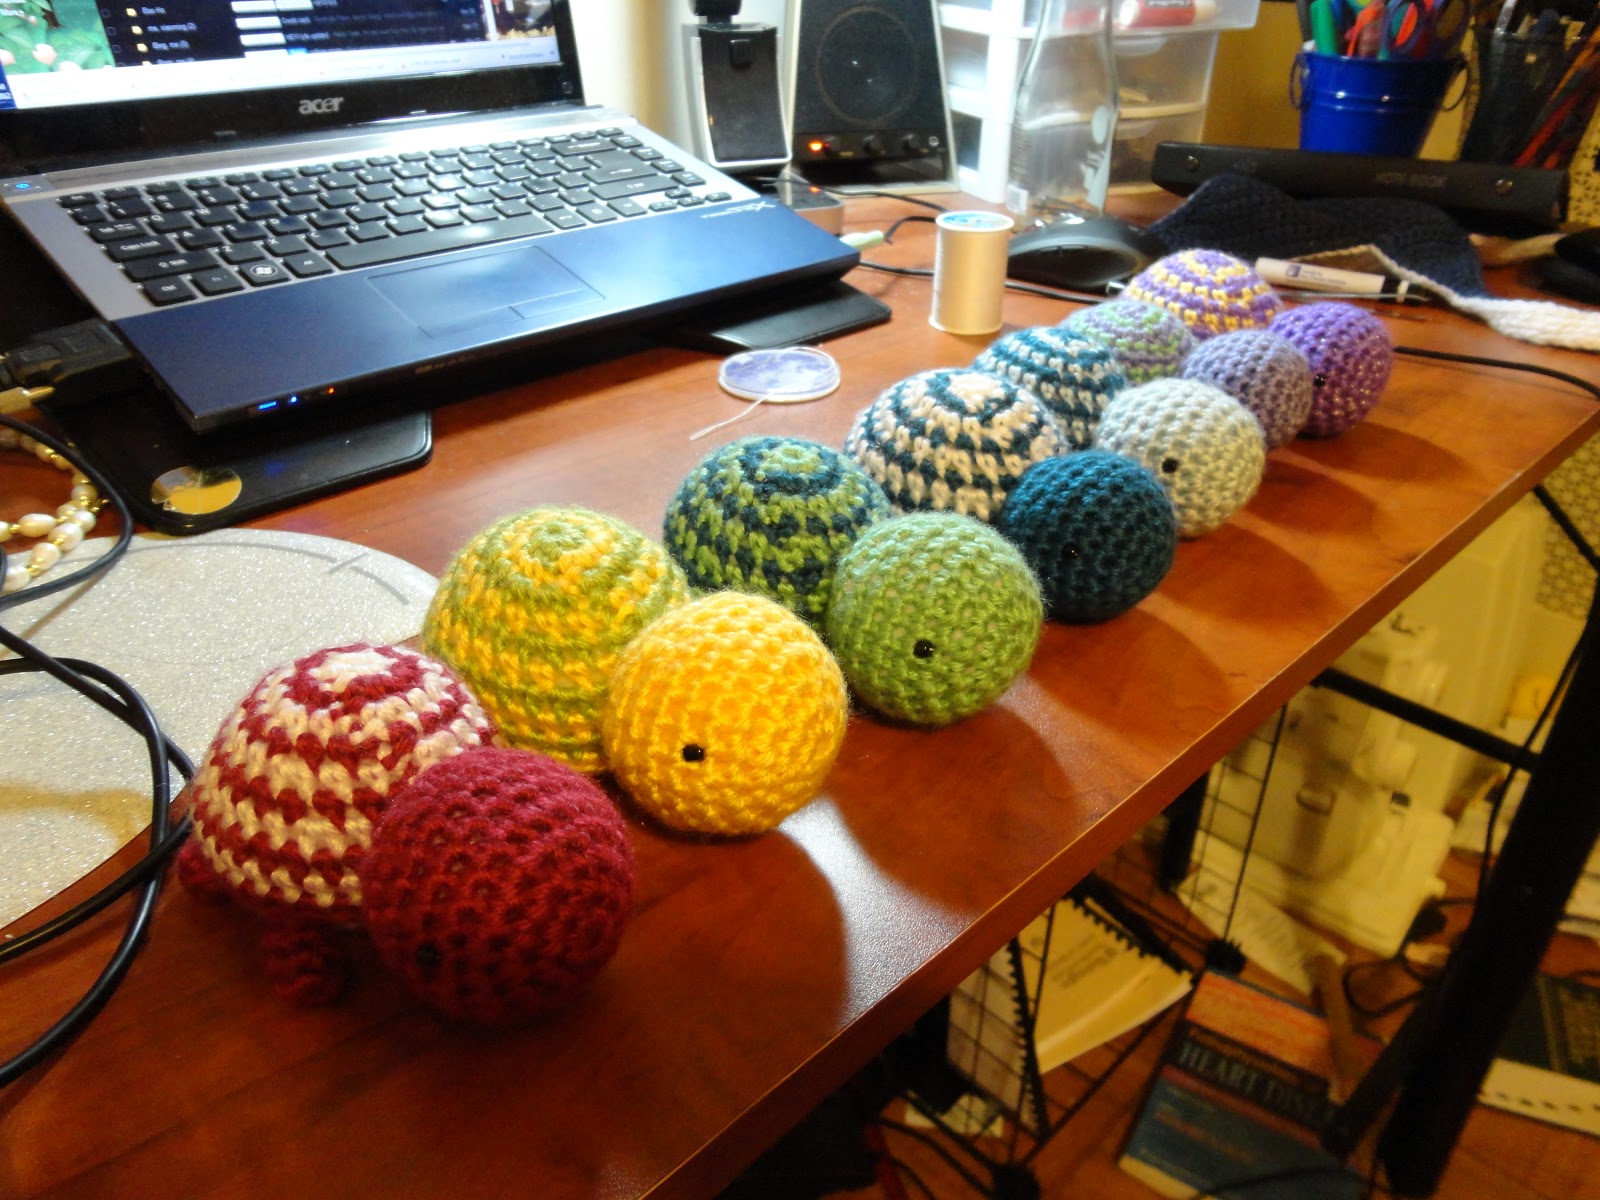
This was their status before I started working on them today. All complete, but eyeless.


A couple episodes of Avatar: The Last Airbender and 14 black seed beads (as seen above) later and...


They are complete!

Note how so many of them are drastically different sizes. Apparently my gauge and stuffing technique can vary by a lot.

These turtles were all made using Caron Simply Soft yarn and an H hook. When stuffing the bodies, I added 5-7 pennies to their tushies to counterbalance their enormous heads.

This turtle was a little different:


You see the gold threads? I took some metallic gold embroidery thread and pulled out a single strand, then crocheted holding that together with the yarn. So this turtle has a little extra sparkle.

Edit: My friends have informed me that this turtle will now and forever be known as Edward. I am passing this information on to you, dear reader.

I can't believe it took me this long to finally get them all done! But now I'm done and so happy. Their adorableness is killing me.


 Thanks for reading, guys!

-Annie

Shared at:

NightOwlCrafting

Friday, November 16, 2012

Commitment Day 16: Basketweave


This is Day 16 of my 30 Days of Commitment series. Check out the other posts in this series, too!

Gosh, I'm sorry, guys. This has been another hectic week for me, and I ended up letting this series slide yet again! But then again, this is sort of what the purpose of this whole series was right?

Well, I just go on thinking like that so I don't feel as guilty. ^_~

What I'm sharing with you today is a pretty old project that I never got around to posting. This bag:


A long time ago, I was flipping through a crocheting magazine and was intrigued by a photo of a cross-body purse made using the basketweave stitch. I found this stitch in my book of many crochet stitches, but it's easy to find. A quick Google search brought me to this tutorial, which looks pretty much like what I did.


This was a pretty easy bag to make. I crocheted two panels of basketweave for the front and back, then crocheted one long strip of single crochet to make the strap. I simply single crocheted along the edges to connect them.


A little too late, I discovered an interesting flaw in this design: a crocheted strap will streeeeetch. And mine was already bordering on too long. So after some pondering, I happened upon this solution. Use ribbon!


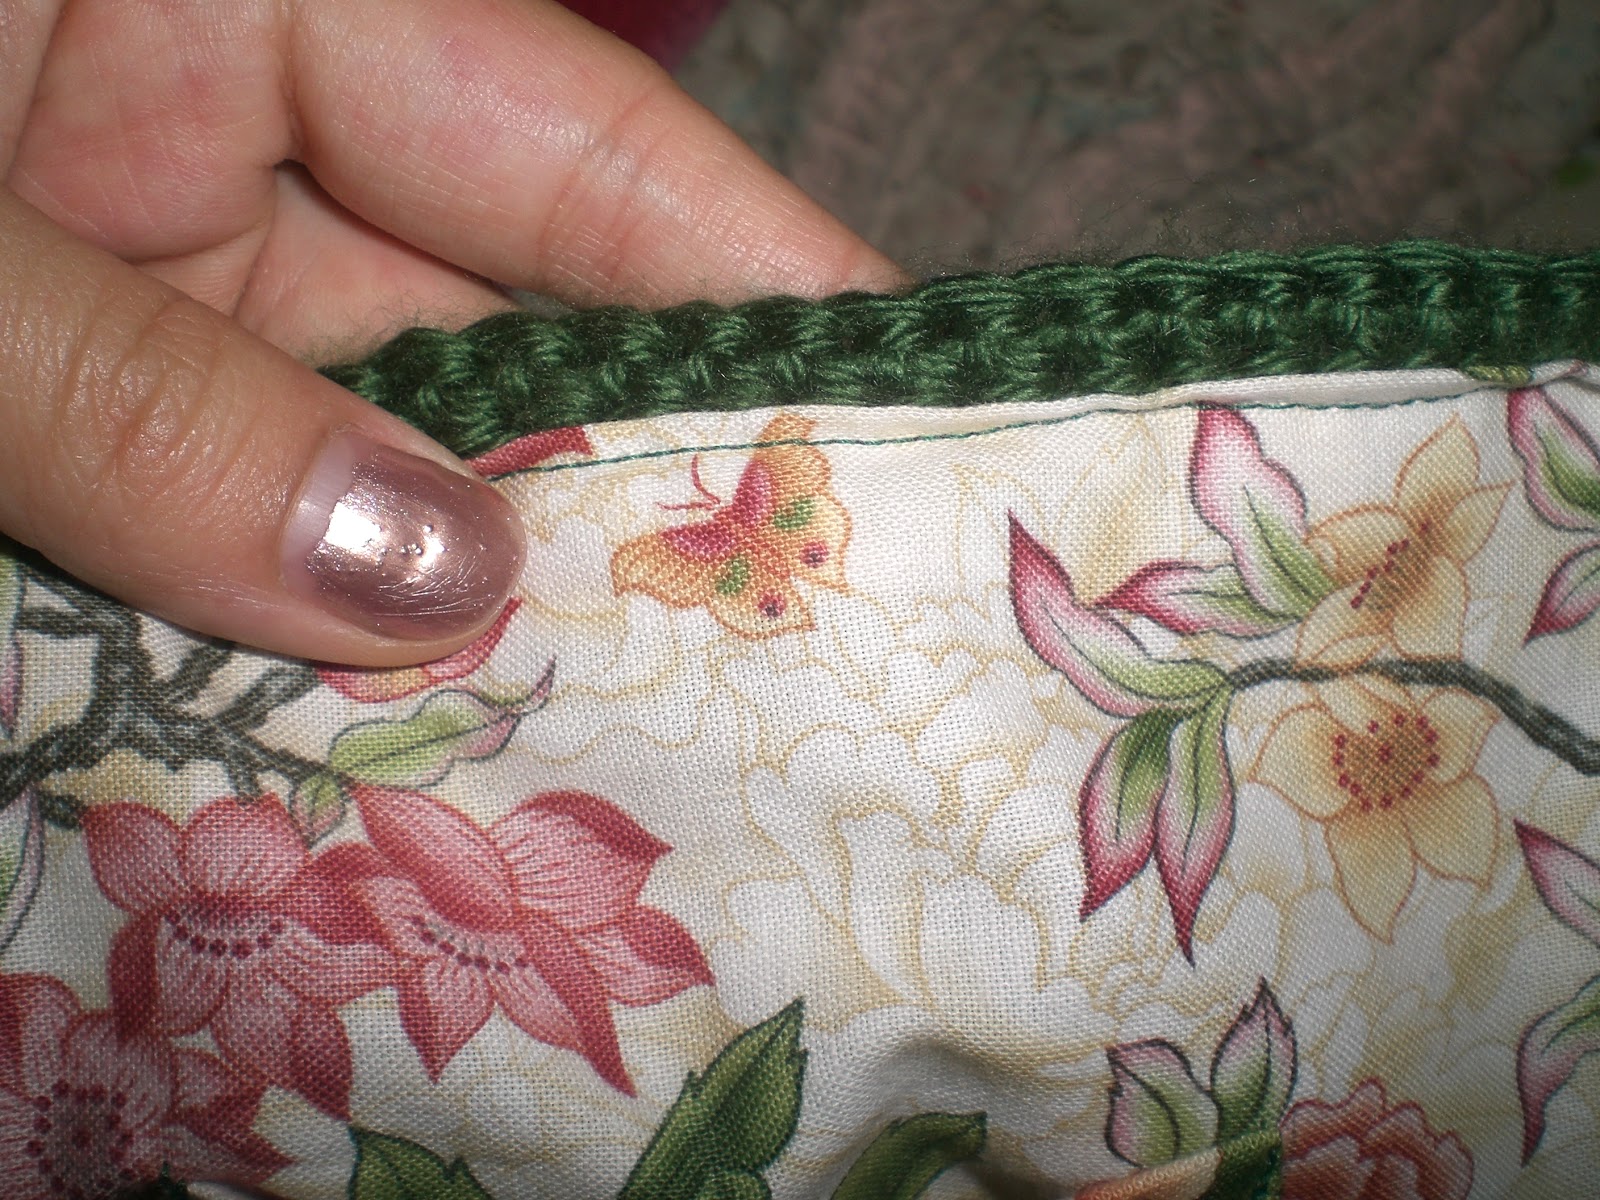
Basically, I found some ribbon in a coordinating color to stabilize it. The ribbon I found wasn't nearly wide enough, so that line you see going down the middle is where I zigzag-stitched two ribbons together. Once this was done, I simply lined up this ribbon strip along the crocheted strap and sewed down each edge. Voila, problem solved!

I chose this gorgeous fabric for the lining. The method for making it was similar: cut out two large rectangles for the front and back and then a long, continuous strip for the sides and bottom.


I did, however, add a couple things to the lining. I added three pockets, two cell phone sized and one larger.


I also added a key fob, because I hate having to fish through a big bag for my keys.


There's also a closure strap that can button at two different buttons, depending on how full the bag is.


And to attach alllll of this to the crocheted portion, I slid in the lining, sandwiched the button strap and the key fob between the two layers, and sewed it all together.

Instead of doing the usual thing with lined bags where you flip everything inside out, etc, etc, I simply folded down the edges of the lining and basically topstitched around the edge. Worked out pretty well. :)


So what do you think? I'm pretty proud of this bag. It makes a nice, casual alternative to those days when I'm just not feeling the backpack (my laptop fits in there nicely). 


I hope you enjoyed this post, and I hope you found it inspiring! I enjoy those times when I see something and am able to recreate it myself without relying on patterns. :)

-Annie

Shared at:


Sunday, November 4, 2012

Commitment Day 4: Afghans


It's Day 4 of my 30 Days of Commitment series! See other posts in this series here.

Yikes, exams are this week! A lot of posts this week will be pic-heavy with hopefully less rambling than usual!

I was about a month into the "learning to crochet" process when I saw the concept of a chevron afghan in a magazine somewhere. The concept was easy (skip a stitch at the "valley", increase a stitch at the "peak"), so I boldly purchased a few skeins of Simply Soft Caron Eco and got to work!

Four years of extremely intermittent crocheting later...

Featuring a guest appearance by Cabbage the panda,
Pancake the polar bear, and Blackjack the dapper black bear.

Before y'all judge me too hard for taking this long, consider this. Lacking any real crocheting experience, I made a fatal miscalculation in the design of this afghan.


It's in single crochet. You guys. This thing is a beast. It's so dense and heavy. It takes forever to add to its length. It's eating up so much yarn. OMG.


See that? That's a page of notes I made when determining the size of this blanket. Its finished dimensions will be about 4.5 feet by 5 feet (currently it's about 70% done). And this thing is going to take 30 skeins of yarn.

*dies*

Someone with afghan-making experience, tell me: is this normal???

Anyways, in my infinite wisdom, I also decided to start a granny blanket last spring. Here's my progress so far, minus a few I have in my carrel at school. I work on those when I have time to kill there and I'm not in the mood to study.


I'm currently going with this configuration. My working plan for these requires almost 150 squares. Yahoo? It'll be about 5.5 feet wide and about 6.5 feet long.


I'm still not sure how I plan on joining these up. Experienced crocheters, do you have preferred joining methods?

Thanks for tuning in, guys, and wish me luck on my tests!

-Annie

Shared at:

Saturday, November 3, 2012

Commitment Day 3: Self-Taught, Self-Motivated


It's Day 3 of my 30 Days of Commitment series! See my other posts here.

When I talk about crocheting with my friends, they commonly ask me to teach them how to do it, or tell me it looks hard. My fellow crocheters, you know it's not all that hard, right?

I am a self-taught crocheter. I don't know how I stumbled upon it in the first place, but for years I have been in possession of a very old Crocheting for Beginners (not sure if that's quite the right title) book. I mean, this thing still had black and white printing. It was crazy.

My grandma taught me knitting when I was very young. I had a brief "knitting revival" in college (AKA a scarf that took me a year to finish), but it left me open to trying new things, and when that old book caught my eye, I decided to give crocheting a try.

It was hard at first. I had to squint at these old grayscale photos for long minutes, then squint and poke at my work, figuring out things as simple as how to count stitches and what on earth this whole turning chain business was.

The worst experience was probably learning to crochet in the round and in a spiral, which I first tackled making the Tiny Striped Turtle. Remember these guys? I don't know about you guys, but it was an absolute nightmare figuring out how to count stitches in the round. But I did it, and check out my success!


That little yellow turtle was my first true crocheting success! Not long after, I went to study abroad in China, armed with a couple hooks. After finding some yarn, I tackled the Swirls Cap pattern, which turned into yet another battle with round-counting, in which I finally mastered the art of keeping count of my stitches!


This is a very old project (like I said, one of my first). Maybe one day I'll do a post recapping my pre-blog projects.

The point of this is not just to tell you guys a boring story about myself. The point is to encourage all of you who read this to jump in and try new things. I would never have gained the confidence I have now if I hadn't picked up that book on a whim and given a new skill a shot. I would not be at this point if I had not picked patterns beyond my skill level and slowly battled my way through them.

If instead I had sat at my desk, admiring the work of others and not trying to surpass myself, I probably wouldn't be crocheting now. If you want to learn, learn! There are hundreds of great books out there to learn from, and probably thousands of instructional videos accessible with a few quick YouTube searches!

Sadly, given the limited time I've had in past years to really "pursue the craft", my skill level hasn't increased by much. However, I do have a few goals set for myself to accomplish in the coming years.

1. Make more amigurumi besides cute little turtles
2. Learn to design amigurumi
3. Crochet clothing
4. Give knitting another try
5. Learn to knit cables
6. Sew my own clothing

What do I have to spur me on? I have this giant collection of patterns and inspirations for amigurumi:

This is just for amigurumi...you don't want to see the massive collections of knitting and crocheting patterns and crafting  and sewing tutorials that I've amassed over the years.

I also have these books as motivation. On the left is a great collection of crochet stitches that I picked up at a used book store. In the middle is a present from a friend, a collection of gorgeous sweater patterns (all knitting patterns, all utilizing cables). On the right is an awesome book of sweater patterns. You can mix and match body, sleeve, neckline, and pocket styles. It's so freaking cool.


And, by browsing crafting sites and online stores like Modcloth and Anthropologie, I have accumulated hundreds of inspirations of clothes, accessories, and crafts I want to make.

It seems like a lot. What use do I have for all of these future ideas, with the finite time I have? How can I expect to master all these skills?

I mean, maybe I won't. I certainly won't recreate every single interesting dress or jacket that I saw on Modcloth. But the point is that I have collected all these things to motivate myself. When I look at my "hoard" of resources and inspiration, I see a goal I want to reach. I want to be that good. I want to be that skilled. I want to be able to devote that kind of time to hobbies I love.

So, inexperienced crafter that I am, this is the advice I offer:

- If you want to do it, do it, don't just sigh about how you aren't good enough.
- Challenge yourself. That's how you learn the fastest.
- Be brave enough to set unrealistic goals and acknowledge them as such.
- Collect your inspirations, and encourage yourself to keep moving forward

Now I want to hear from you! Share in the comments how you learned to sew/knit/crochet/whatever it is that you do! What is your advice to budding crafters?

-Annie

Saturday, April 14, 2012

News!

I can't believe this! My instructional video for the Forever 21 infinity scarf has over 27,000 views, and my channel has over 200 subscribers! This is pretty modest in the world of YouTube, but it's definitely beyond anything I ever expected! Thank you all so much for your kind words and your interest!

Important thing: the post I've linked above (and here again) is the new MASTER POST for the Forever 21 infinity scarf. If you have any questions, please check there first! If after reading, you still have questions, comment or send me an email, and I will update the post ASAP with my answer.

So I wanted to share the work of a few people who have made use of this pattern, and hopefully it inspires more of you to try making this scarf and adding your own unique touch to it!

First up is Emily of Just Stringing Along. She made four scarves using my pattern as an inspiration, but made a little modification (I LOVE that!): she replaced the treble crochet with a quad crochet, and let me just say, her scarves look ridiculously cozy. Check out her blog post to see all three!


The next two lovely ladies sent me emails with photos. Danette used a lovely, bright yellow for hers:


And Martina did something really pretty: she used different colored yarns (two shades of green). And then she shipped this lovely thing off to her sister as a gift!


Like I said, use these ladies' work as a starting point for your own unique works. I hope to see even more people using this pattern and sharing their results. Your scarves are beautiful, ladies, and thank you for sharing!

Thanks for reading, and I'll be back (relatively) soon with a new post! Ta-ta!

-Annie