It seems that all the "important" things in life are always the more difficult and awkward to address.
Backstory: My school is hosting a silent auction, and I was considering making some items to donate. When I they asked for the estimated monetary value, I decided to do a quick search to see how much people are charging for handmade items.
Lo and behold, during my search, I found someone selling a product that, for all intents and purposes, looks exactly like something I've provided a pattern for. Which brings me to the topic of today's post.
I post patterns on this blog because I want people to know how to make the pretty scarves and hats they see online. I value my ability to say, "I could make that," and I want other people to be able to say the same thing when they see easily craftable items being sold for high prices.
As I say in my note (in the left column), you are all perfectly free to sell items you make from my patterns. It's fun to make money doing something you love. However, and this is very important, please provide a link to the pattern you used. I want your customers to have the same freedom you did in using a pattern I provided for free to make something for your own use (whether that be to keep, gift, or sell).
I know this is counterproductive to the seller. And I know the particular pattern in question is simple, and it is not impossible that this seller came up with it on her own. Also, as far as I know, I have no legal clout in this.
However, in the spirit of fair sharing and good faith that I have found are a huge part of the online crafting community, I hope that people will be honest.
Thanks for reading, guys.
-Annie
Showing posts with label Pattern. Show all posts
Showing posts with label Pattern. Show all posts
Sunday, January 29, 2012
Tuesday, October 25, 2011
Infinity Scarf: The Master Post!
A note: Changes have been made in this post to address the myriad questions I have received about this scarf. Please refer to this post for answers to your questions, and comment on this post with any other questions you might have. I will reply ASAP as well as update the post itself with my answer. Let me reiterate that this pattern is extremely flexible, so I am hesitant to provide you with things like yarn weight, hook size, number of rows, etc. Make it how you like it!
Pattern
Ch = chain
In addition, I made a brief video so you can actually get a visual of this. Please let me know if there is anything you would like me to do to improve on quality for this and possible future videos and/or patterns!
Another note: Youtube user beautytipsbyshane brought up an interesting point in a comment on my video. This pattern doesn't have an official name. I am proposing that it be called the Crossed Clusters stitch. Thoughts? Any suggestions of better ones?
Hello all! It has been too, too long! In the rush of everything that is medical school, all of my projects and even the first birthday of The Stingy Stitcher have passed by already.
Unfortunately, as usual I have very little time, so today's post will be short and sweet...hopefully we'll have time to play catch-up another day!
This is a more detailed version of the Infinity Scarf pattern I posted here a long while back. A couple people were (understandably) confused by my vague instructions, so here we go again!
Forever 21 Infinity Scarf
Dimensions (relaxed): 8 inches wide and 56 inches long (before joining the ends)
10 pattern repeats, 57 rows
Dimensions are not concrete. This pattern can be easily modified to be whatever width and whatever length you want.
Yarn: Caron Simply Soft (worsted weight), 1 7-oz skein (366 yards)
Hook size: J
Again, this is nothing concrete. Use whatever yarn you like and a hook size appropriate to that yarn, then adjust your gauge to get whatever size scarf you'd like. Also, with scarves I do one of two things: I either keep going until I've used up one skein of yarn, or I keep wrapping the scarf around my neck until it reaches a length I like.
Ch = chain
Sc = single crochet
Dc = double crochet
Tr = treble crochet (it is my understanding that triple crochet = treble crochet; at least, that is what Google tells me)
Hk = hook
St = stitch
Sk = skip
Notes:
- The beginning ch-4 always counts as the first stitch.
- The stitch marker isn't actually necessary, but putting that in the pattern makes it a little easier to explain.
- The beginning ch-4 always counts as the first stitch.
- The stitch marker isn't actually necessary, but putting that in the pattern makes it a little easier to explain.
For a scarf with 10 repeats:
Ch 36.
R1: Place stitch marker in 6th ch from hk. Tr into next 2
ch. Dc into ch with marker. Remove marker. *Sk 1 ch (from the second tr). Tr
into next 2 ch. Dc into the skipped ch. Repeat from * 8 more times (only one ch
is left unworked). Tr into last ch.
R2: Ch 4, turn. *Sk next st. Tr in next 2 sts. Dc in skipped
st. Repeat from * 9 more times. Tr into last st.
Repeat R2 as desired.
To make the scarf wider or narrower, add or subtract chains
in your starting chain in multiples of 3.
Edit: A reader asked me how I joined the ends of the scarf when I was finished. The first time around, I just used a whip stitch and it was fine. However, the second and third scarves (haven't posted about the third one yet, but soon!) had foundation chains that were too loose, so I removed the foundation chain and used a whip stitch. The photo tutorial can be found here.
Edit: A reader asked me how I joined the ends of the scarf when I was finished. The first time around, I just used a whip stitch and it was fine. However, the second and third scarves (haven't posted about the third one yet, but soon!) had foundation chains that were too loose, so I removed the foundation chain and used a whip stitch. The photo tutorial can be found here.
In addition, I made a brief video so you can actually get a visual of this. Please let me know if there is anything you would like me to do to improve on quality for this and possible future videos and/or patterns!
Thanks for reading, and I hope to be seeing you all again soon!
-Annie
Monday, February 7, 2011
Ranting, housekeeping, and stitch patterns
Hey there everyone! As always, I seem to post in stops and starts, especially now that the busy semester has once again set in. Was anyone else on here hit by that crazy blizzard? I live in an apartment in Chicago and go to school in Chicago = SNOW DAY!!! Except it wasn't actually that awesome, because it totally screwed with my schedule.
But anyways, moving past my self-pity, I wanted to share something that has really lifted my heart. My blog has already passed 5000 views!!!!
Did you get that?

See that in the background? That's my boyfriend's bunk bed/futon (yeah, you read that right), which he scored for $25!!! Can you believe that? The frame and the heavy, high-quality mattress! Though he didn't get the mattress for the top bunk. I love me some garage sale-hopping!


But anyways, moving past my self-pity, I wanted to share something that has really lifted my heart. My blog has already passed 5000 views!!!!
Did you get that?
5000 VIEWS!!!!!!
Thank you so much, dear readers, for validating this stingy stitcher's poor soul with your interest and lovely comments! I hope that I continue to prove interesting, because, come on, who doesn't love knowing that people take an interest in what you do?
So first, really quick, I took some more pictures of the Teenage Mutant Ninja Turtle hat I crocheted for my friend a while back (there's a mini-tute of how to make it via that link). She's camera-shy, and I've more or less moved past that phase that since photography is so vital in the online crafting community. :) So here we go, with the maker as the model!

See that in the background? That's my boyfriend's bunk bed/futon (yeah, you read that right), which he scored for $25!!! Can you believe that? The frame and the heavy, high-quality mattress! Though he didn't get the mattress for the top bunk. I love me some garage sale-hopping!


I love that the hat's nubby, thick, and warm. And there are earflaps! I want a hat like this, though probably not TMNT. I don't think I've ever watched a complete episode even, haha.
With that taken care of, I wanted to share a little something else with you. Maritza from California requested that I share the stitch pattern to my mother's Christmas shawl, which you all might remember...

Now, since I'm sure that the rest of you are just so riveted by my work that you were unable to summon the willpower to ask yourselves (hardy har har), I'm sharing it here! Read on to see it!
Tuesday, December 28, 2010
Blue infinity scarf: A Forever 21 knock-off, shhh!
Edit: This pattern's popularity has proven greater than I ever dreamed. I have posted a pattern and video in this MASTER POST! :D All questions will also be answered in that post, so please check there before asking!
Hi there everyone! I hope you've had a happy holiday and are looking forward to a fun New Year's celebration! Given my circumstances, I won't be posting Christmas gift photos for a while yet, but today I will be showing you the infinity scarf I made during final to de-stress during study breaks.
Voila!
So the inspiration behind this one came from this Forever 21 scarf. I saw the scarf in the store and loved it, but being the stingy stitcher that I am, the first thought that jumped into my head was, "I could make that!" And I did! If you look closely at the pattern, you can probably figure it out for yourself as well...it was quite simple. And is anyone else secretly amused that F21 called it a knit scarf?
Here's a shot of the scarf in its entirety. It's probably the most true to color. I have start remembering to take pictures in natural light!

For those who are curious, I used a little less than a skein of Caron Simply Soft Berry Blue and (I think) a J hook. Here is a shot of the stitch pattern, since I think it's upside down in the product shot.

If you'd rather not do the work of figuring it out, here's the pattern.
Hi there everyone! I hope you've had a happy holiday and are looking forward to a fun New Year's celebration! Given my circumstances, I won't be posting Christmas gift photos for a while yet, but today I will be showing you the infinity scarf I made during final to de-stress during study breaks.
Voila!
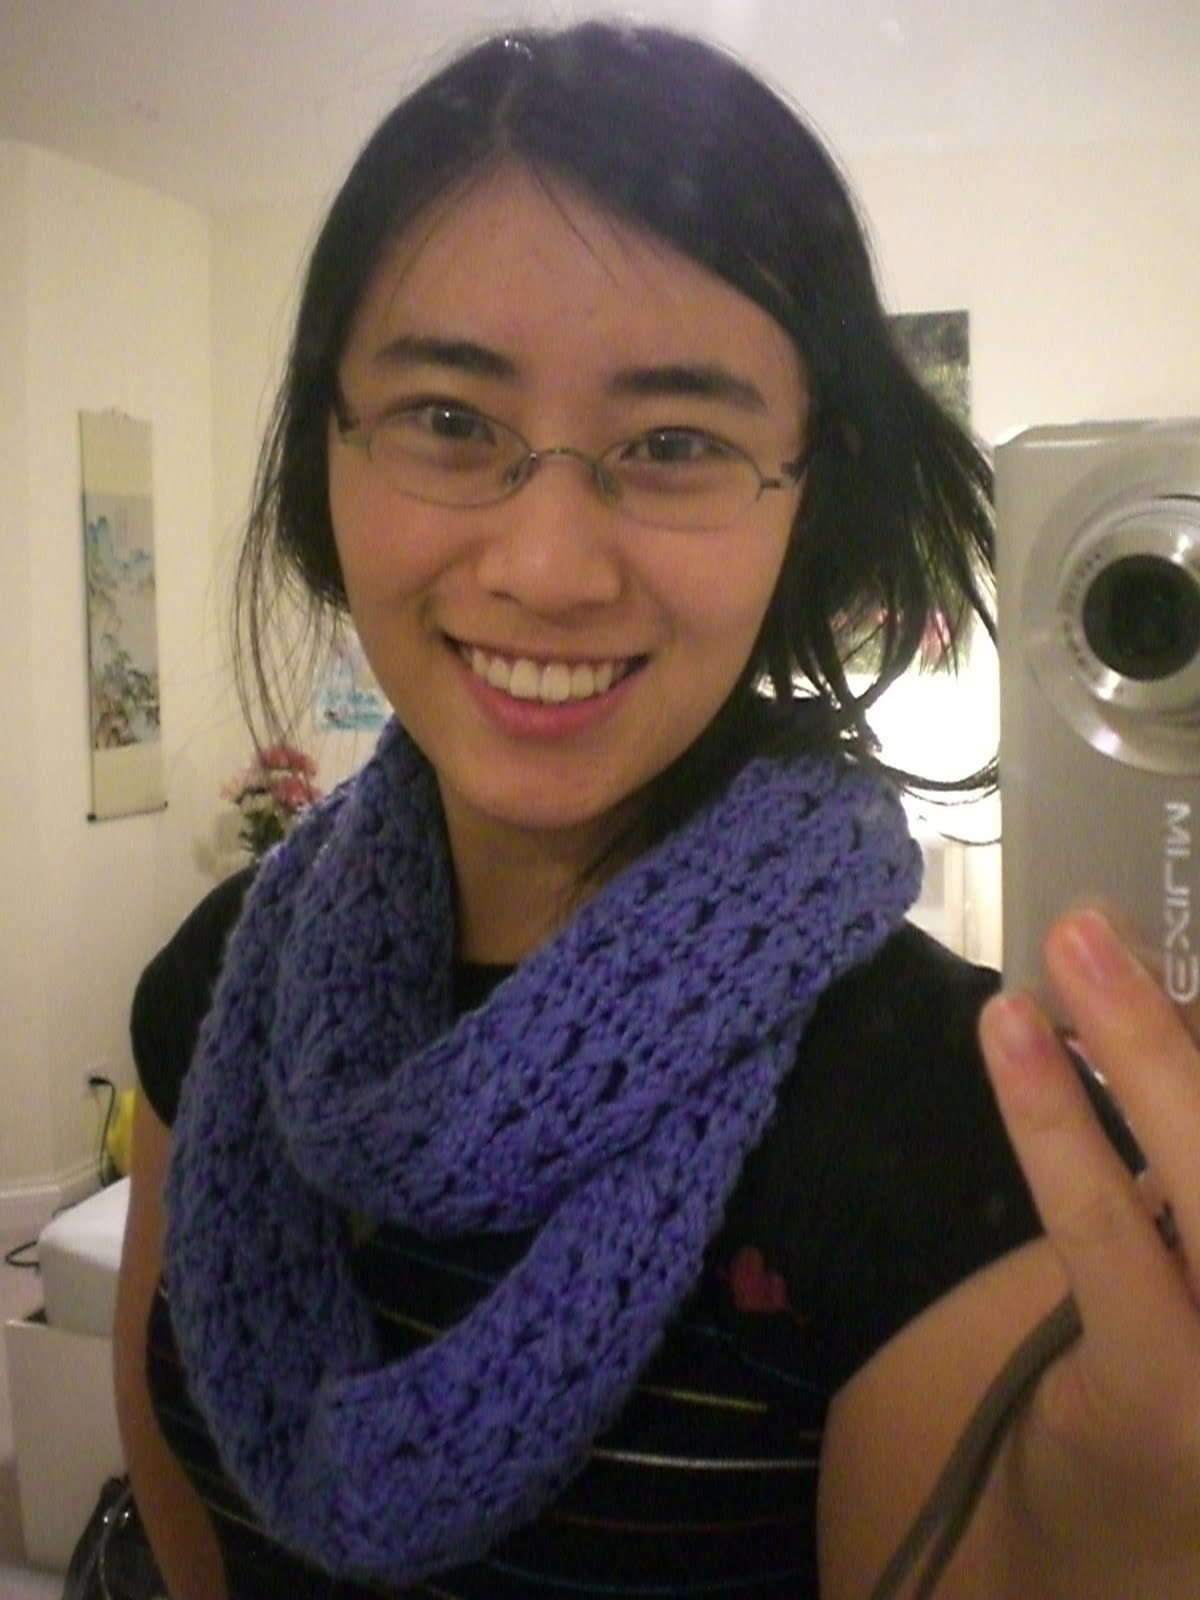 |
| Floofy hair! |
So the inspiration behind this one came from this Forever 21 scarf. I saw the scarf in the store and loved it, but being the stingy stitcher that I am, the first thought that jumped into my head was, "I could make that!" And I did! If you look closely at the pattern, you can probably figure it out for yourself as well...it was quite simple. And is anyone else secretly amused that F21 called it a knit scarf?
Here's a shot of the scarf in its entirety. It's probably the most true to color. I have start remembering to take pictures in natural light!

For those who are curious, I used a little less than a skein of Caron Simply Soft Berry Blue and (I think) a J hook. Here is a shot of the stitch pattern, since I think it's upside down in the product shot.

If you'd rather not do the work of figuring it out, here's the pattern.
Monday, November 29, 2010
History told in turtles
Hi there! Long time no see, yes? I have been, and still am, completely swamped with applications and schoolwork, so work on the blog suffered, unfortunately. Some crafting has taken place and I hope that soon I will be able to get some photos taken and proper entries written about them.
That, though, will have to wait for another time! For now, I'd like to share with you what probably really sucked me into crocheting: the famous Tiny Striped Turtle by KristieMN of Crochetville. This pattern has been bouncing around the interwebz for nearly 4 years now, and it is a great pattern, in my opinion, for beginners at amigurumi. I mean, everything is round, how can it go wrong???
So like I said, this is pattern is probably responsible for my obsession now. In order to master it, I spent days learning how to crochet in the round (you have no idea how hard it was for me to figure out how to count stitches >_>). Switching colors was another experiment that the turtle dared me to try. So with my first H hook and my grandmother's eight-year-old baby yarn, I crocheted my very first turtle!

Introducing...um...well, Turtle Number One, I guess he doesn't have a name. I used all yellow WW yarn and two gold beads I found in my stash as his eyes. When I went to show it off to my mom, she totally fell in love and asked to have it! So now Number One lives in her office, tending to the paper roses I gave her for Mother's Day. He's done a great job so far!

Next is Mr. T. I crocheted this little guy for my boyfriend, who suggested all the crazy color changing in the first place. Although I don't think I'd do it again (for turtles, at least) the half and half pattern on the head left a very interesting stitching-like pattern. He's especially tiny (see Chapstick for reference) because I hadn't learned to stuff the bejeezus out of these guys yet.

Then, I wanted to experiment with crocheting with embroidery floss. Unfortunately, I attempted this with an E hook which was waaaaaaay to big. As such, Tiny Tim here is quite holey and can only hold a certain amount of stuffing without showing off his insides. This means he's a bit sad and floppy, and certainly too delicate to be the keychain I'd intended him to be. Hence the name.

Enough with the altruism! I wanted a turtle for myself! After the slight fiasco with the super thin embroidery floss, I went the opposite direction and used some of the Homespun yarn left over from my first and only hand-knit scarf. This is Misty. By the time I made her, I had learned two very important things about the Tiny Striped Turtle species. One, they need to be stuffed. The cuteness factor is directly proportional to the amount of stuffing that can feasibly fit inside these guys. And two, if you add weights to the shell portion, the hugeness of the head won't cause your turtle to topple forward (which is why Number One is always gazing up at Mom's flowers, not scanning the perimeter as a good guard should do).


I decided to do something a little more ambitious. You may remember my Japan-ophile friend Katherine who received this (if I do say so myself) adorable sakura purse from me for her birthday. Well, she was just as much of a Japan-ophile back then (about one and a half years ago), so I decided to make her a Japanese flag turtle! She totally loved it, and even tells me that she gave it a little flag made from a toothpick and paper saying, "Ganbatte!" or "Do your best!" >_< SO FREAKING CUTE
Since she is half-Greek, I was actually hoping to do a Greek flag turtle for her, too. Then, after exhausting my vocabulary of curses on the red dot on Japan's behind, I gave up on Greece. Serious props to anyone with the nerve to even try it.

This here turtle was for my friend, Daniel. I feel like I rushed the process a bit...looking back on it I wish I had paid more attention to the stuffing. Still, I think he really liked it, as he spent a great deal of that day thrusting Turtle Number Six in people's faces with a silly grin on his.

Meet Enrique. Enrique is a cross-dresser who patrols my roommate Bing's desk. It kind of hurts that my own creation won't let me take just a leeeeeetle peek at Bing's super-secret world-domination plans. Or maybe she's hiding chocolate in there? I'll never know, because old Enrique is more than a match for me. T_T

After learning about my mad crochet skillz (HAHAHAHAHAHA), two of my friends asked for turtles of their own. This is the first completed one. As described by the recipient, Margie, "It's a he/she named Charlie." Hmm...have my turtles suddenly become genderbenders or something? Anyways, you can't really tell in the picture, but Charlie is actually crocheted from Simply Soft Persimmon and Sunshine yarn, very bright colors that sadly washed out in the webcam. You can see the Persimmon in my infinity scarf, and just picture a very bright, warm yellow for the Sunshine. The other turtle (fully crocheted, just needs to be stuffed and assembled) is in Sunshine and Chocolate, and should be finished...soon... <_< >_>
Well, that's all for today, folks! The history of nine turtles (or maybe eight and a half). If you haven't tried this pattern, DO IT. It's so easy and quick, and it is seriously one of the most adorable things I have ever seen. Their turtle tushies are especially cute with the big round butt and stubby legs and tail. I hope you enjoyed!
Monday, October 18, 2010
Gauntlets and bows
Hey there all! Well, it's been a while since my last post, no? Sorry, applications decided to devour my life again. @_@
I'm here with my most recent creation. I was itching to crochet between applications, and I'd recently been wanting to crochet myself some uber-stylish fingerless gloves. So, I went to this pattern provided by the talented WolfDreamer. I got out my Cotton-Ease yarn (from my awesome new stash that my awesome roommate got for my birthday) and size G hook, and set to work!
I immediately encountered issues. The 28 rows she has for the cuff were waaay too big for me. I don't know if my teeny wrist is even teenier than her small hands, or if she crochets really tightly/I crochet loosely. Who knows? Anyways, I modified the pattern so I started with 22 rows in the cuff.
However, it was a little too short for me when it was time to create thumb hole (odd, no?). After pondering for a bit, this is what I did for each hand for the 12th row. Keep in mind that I was working off of a row of 26 stitches. If you go my route but are using a different number of stitches per row, I just made sure that the eight stitches formed by "2 sc in next st, sc 4, 2 sc in next st" are the eight that are skipped in the next row.
R hand: sc 18, 2 sc in next st, sc 4, 2 sc in next st, sc 2. (28 sc)
L hand: sc 2, 2 sc in next st, sc 4, 2 sc in next st, sc 18. (28 sc)
Then, I proceeded with Row 12 of WolfDreamer's pattern. And here is the result!

Cute, yes? I like these much better than my last attempt because the last time I made gloves, the yarn was too thick, so I decreased the stitches per row but forgot to decrease the number of rows, so they went halfway up my forearms. >_> Not good, especially for a girl who constantly checks her watch. These are much better.
Plus, I LOVE the finger loop. It takes me back to high school when I was obsessed with a manga (Japanese comic) called Inuyasha. My favorite character, Sango, had these kickbutt gauntlets that I wanted SO BAD. This is decently close. ^_^
Here's another shot of the palms. Forgive the dorky pose...I blame my photographer.

I was still a bit unsatisfied after the gloves...I craved MORE. So I sat down and came up with a little bow!

I don't know about a pattern for this one...I just single crocheted rows of 4 sts until it was long enough to loop around and make the bow. I slipstitched the ends together and somehow managed to turn it 90 degrees and crochet a couple rows of 2 scs to make the center part. Then, I just slipstitched it in place in the back. If I try to explain better, it'll just be more confusing. >_<
The cool part is, I just bought a bunch of those really thin headbands, so I can just slip it on whichever color headband I feel like wearing and feel instantly cuter!

I also want to try slipping a chain through it to make a necklace, like the Anthropologie Feeling-Dapper necklace.
So there you have it! I hope you enjoyed!
-Annie
Shared at:


I'm here with my most recent creation. I was itching to crochet between applications, and I'd recently been wanting to crochet myself some uber-stylish fingerless gloves. So, I went to this pattern provided by the talented WolfDreamer. I got out my Cotton-Ease yarn (from my awesome new stash that my awesome roommate got for my birthday) and size G hook, and set to work!
 |
| You rock, Bing! |
I immediately encountered issues. The 28 rows she has for the cuff were waaay too big for me. I don't know if my teeny wrist is even teenier than her small hands, or if she crochets really tightly/I crochet loosely. Who knows? Anyways, I modified the pattern so I started with 22 rows in the cuff.
However, it was a little too short for me when it was time to create thumb hole (odd, no?). After pondering for a bit, this is what I did for each hand for the 12th row. Keep in mind that I was working off of a row of 26 stitches. If you go my route but are using a different number of stitches per row, I just made sure that the eight stitches formed by "2 sc in next st, sc 4, 2 sc in next st" are the eight that are skipped in the next row.
R hand: sc 18, 2 sc in next st, sc 4, 2 sc in next st, sc 2. (28 sc)
L hand: sc 2, 2 sc in next st, sc 4, 2 sc in next st, sc 18. (28 sc)
Then, I proceeded with Row 12 of WolfDreamer's pattern. And here is the result!

Cute, yes? I like these much better than my last attempt because the last time I made gloves, the yarn was too thick, so I decreased the stitches per row but forgot to decrease the number of rows, so they went halfway up my forearms. >_> Not good, especially for a girl who constantly checks her watch. These are much better.
Plus, I LOVE the finger loop. It takes me back to high school when I was obsessed with a manga (Japanese comic) called Inuyasha. My favorite character, Sango, had these kickbutt gauntlets that I wanted SO BAD. This is decently close. ^_^
 |
| Awesome, right? |

I was still a bit unsatisfied after the gloves...I craved MORE. So I sat down and came up with a little bow!

I don't know about a pattern for this one...I just single crocheted rows of 4 sts until it was long enough to loop around and make the bow. I slipstitched the ends together and somehow managed to turn it 90 degrees and crochet a couple rows of 2 scs to make the center part. Then, I just slipstitched it in place in the back. If I try to explain better, it'll just be more confusing. >_<
The cool part is, I just bought a bunch of those really thin headbands, so I can just slip it on whichever color headband I feel like wearing and feel instantly cuter!

I also want to try slipping a chain through it to make a necklace, like the Anthropologie Feeling-Dapper necklace.
So there you have it! I hope you enjoyed!
-Annie
Shared at:
Friday, October 8, 2010
On a roll!
Haha, so somehow in the past week I have managed so many posts! I have no idea why or how, it just happened! So today's is really short and sweet, just two small things with simple instructions if you're interested.
First up is my new camera case in a REALLY bright purple (Simply Soft Collections Grape, I believe). I messed around with it for a couple hours before I settled on a stitch and design I liked.
Ta-dah!


Also, remember that star I just posted about? Well I took this boring old clock we had and changed the face to a little patchwork of my scrap paper! Wouldn't it have been a shame to toss out all those huge pieces of lovely paper? Here comes Stingy Stitcher to the rescue!
All I have to do is figure out a pretty way to indicate where the numbers are. I'm thinking dots, or maybe number stickers. Any suggestions?
Click if you want to see the camera case pattern!
First up is my new camera case in a REALLY bright purple (Simply Soft Collections Grape, I believe). I messed around with it for a couple hours before I settled on a stitch and design I liked.
Ta-dah!


Also, remember that star I just posted about? Well I took this boring old clock we had and changed the face to a little patchwork of my scrap paper! Wouldn't it have been a shame to toss out all those huge pieces of lovely paper? Here comes Stingy Stitcher to the rescue!
 |
| From blah... |
 |
| ...to cute! |
Click if you want to see the camera case pattern!
Wednesday, October 6, 2010
Infinity scarf, plus a pattern!
Hello again! I'm taking a quick break from applications and posting a little something I pounded out last month.
The first time I heard the words "infinity scarf," I was thinking something super-cool, like the infinity dress (btw, if you don't know what that is, Google it, it's pretty much the coolest thing I've ever seen and a project I want to tackle in the future). But no. Google "infinity scarf," and you get...

A circle.
Really?!
I was a bit disappointed. The cool name totally let me down. But at the same time, it inspired me. What crafter doesn't look at that and think, "I could make that."
So I did! At the same time, I wanted to try a technique I had seen in a crocheting magazine this summer. It had this really cool "poofy" effect, so I went with the super-generalized notes I had written in my little inspiration notebook.
One weekend later, here's the finished product!

(Ignore the flower that appears to be sprouting out of my head >.>)
Cute, no? And do you see the ruffly, poofiness I was talking about?

And as a bonus, you get an easy-peasy pattern for a really cute scarf. This can easily be modified in many, many ways, which I will discuss below. :)
The first time I heard the words "infinity scarf," I was thinking something super-cool, like the infinity dress (btw, if you don't know what that is, Google it, it's pretty much the coolest thing I've ever seen and a project I want to tackle in the future). But no. Google "infinity scarf," and you get...
A circle.
Really?!
I was a bit disappointed. The cool name totally let me down. But at the same time, it inspired me. What crafter doesn't look at that and think, "I could make that."
So I did! At the same time, I wanted to try a technique I had seen in a crocheting magazine this summer. It had this really cool "poofy" effect, so I went with the super-generalized notes I had written in my little inspiration notebook.
One weekend later, here's the finished product!

(Ignore the flower that appears to be sprouting out of my head >.>)
Cute, no? And do you see the ruffly, poofiness I was talking about?

And as a bonus, you get an easy-peasy pattern for a really cute scarf. This can easily be modified in many, many ways, which I will discuss below. :)
Subscribe to:
Posts (Atom)