Thursday, March 7, 2013

One more for the bucket list: Cosplay!

Hello again!

I once more have something crafty to share with y'all, and I'm actually super proud of it. This is my first cosplay! I have always wanted to do it, and now I can finally say that I have!

Now cosplay is essentially dressing up as a character or even things from books, TV shows, movies, etc. It's pretty popular at anime and other types of conventions. However, when my friends and I decided to cosplay, we did it for school.

Sort of. You may be surprised to learn that medical school isn't always "study study study". We have time for fun things, like our belated Lunar New Year Festival that just happened last Saturday. It consists of acts performed by medical students, undergrad students, and some of the other schools on our campus (PT, OT, audiology, etc) putting together acts to perform for fellow students, faculty, and really anyone else we care to invite.

One of these acts that I participated in was a dance inspired by Avatar: the Last Airbender and The Legend of Korra (I talked about them in the post about my favorite TV shows). Any fans here?

Quick introduction for those who are not familiar with the Avatar universe: in this world, some people are born with the ability to manipulate ("bend") one of the four elements: air, water, earth, and fire. The Avatar is the lone person in the world who can bend all four. Bending is commonly used in combat, so in the TV show, the animation of each type of bending is based off of a martial art.

In this dance, we correlated each of the elements with a dance style. Water was more lyrical, earthbending was step, fire was hip-hop-ish, and air was breakdancing. Two of my friends (and fellow Avatar fans) who were in the dance with me decided, "What the hey, we're gonna cosplay this!" Water, fire, and earth all have one major female character associated with them, so we went as Katara, Azula, and Toph, plus an Aang!

BUT! I'm the only one of us three (four, if you included our airbender, who we roped into cosplaying with us) who can sew. I have made from scratch a grand total of three real garments for myself: this shirt and two pairs of PJ pants. This was my first time using darts, an invisible zipper, interfacing, and inset sleeves.

But hey! Two weeks, four costumes, almost no experience? On top of rehearsals for three different acts for the Lunar New Year Festival and schoolwork? Totally doable!

That sounds sarcastic. And you know what? It was hard...but I did it! And we looked fantastic!


Sadly, our airbender had to leave the performance early, so no group picture with him. :(

Some of my preliminary doodles (with the measurements blanked out, for obvious reasons):


See more photos of the costumes after the cut!

Tuesday, January 15, 2013

A Braided Scarf with Extra Glitz

Hi guys! I hope you all had a fantastic holiday season! I had a fun break, and I'm doing my best to stay on track with schoolwork and working out this year. To those of you who make New Year's resolutions, or who (like me) are constantly trying to turn over a new leaf and change for the better, I read this interesting article about how to stick to your goals. I don't know how well it works, but it's certainly worth a try!

So for this block of classes, one of my goals was to maintain attendance at my lectures. They aren't required, but my theory is that if I go to them instead of watching the video recordings afterward, I might manage my studying a bit better. Going along with that, I have also been trying to dress nicely for my classes. Some days I really only have time for the T-shirt, sweater, and jeans routine, but most days I have more time for a more "special" outfit, and it's part of today's outfit that I wanted to share with you.

This braided scarf concept has been circulating around the internet for quite a while. I really love wearing it this way and have shown it to a lot of my friends. I won't bother with a tutorial since the link already explains it perfectly well, but I just wanted to share a some inspiration for jazzing it up a little.

So today, I was planning on tying a brown silk scarf in a braid, but it lacked something. I realized that I was wearing these gold hoop earrings (they are not in the photos, as by the end of the day my allergies had started acting up and necessitated removing them), and I really needed a little more sparkle for a cohesive look.

And what did I reach for? A simple gold necklace. A little weaving and ta-dah!


(One of these days, my room will be clean and I will not be ashamed to have a wider frame in my photos. >_>)


It came out looking pretty darn cool, and it was very easy to do.


I simply unclasped the necklace and fed most of the chain through a loop at the very bottom of the braid. Leaving a very short portion dangling, I wove the chain through the braid, looped it behind the braid at the top, and wove it back down again along a different strand. Then all I had to do was refasten the chain at the back of the bottom of the brain and pow! Instant glitz!


So for those of you who find that the fancy scarf braid isn't fancy enough, give this a shot! Use a pretty chain, or maybe a string of beads or pearls. And of course, try this with other scarf-tying methods, too! It could really turn your scarf into something extra-special.


This braid and a mock men's tie (as shown above) are probably the ways I most commonly wear "fashion" scarves as opposed to scarves worn for warmth.

How do you guys like to wear your scarves? Would you try what I did with my braided scarf?

Thanks for reading!

-Annie

Tuesday, December 4, 2012

Coming out of my shell...

Guess what I've been up to since my last post?


TURTLES!!!


I posted way back when about all the turtles I had made previously using the Tiny Striped Turtle pattern.


Since then, you may vaguely recall a post last from earlier this year with this picture:


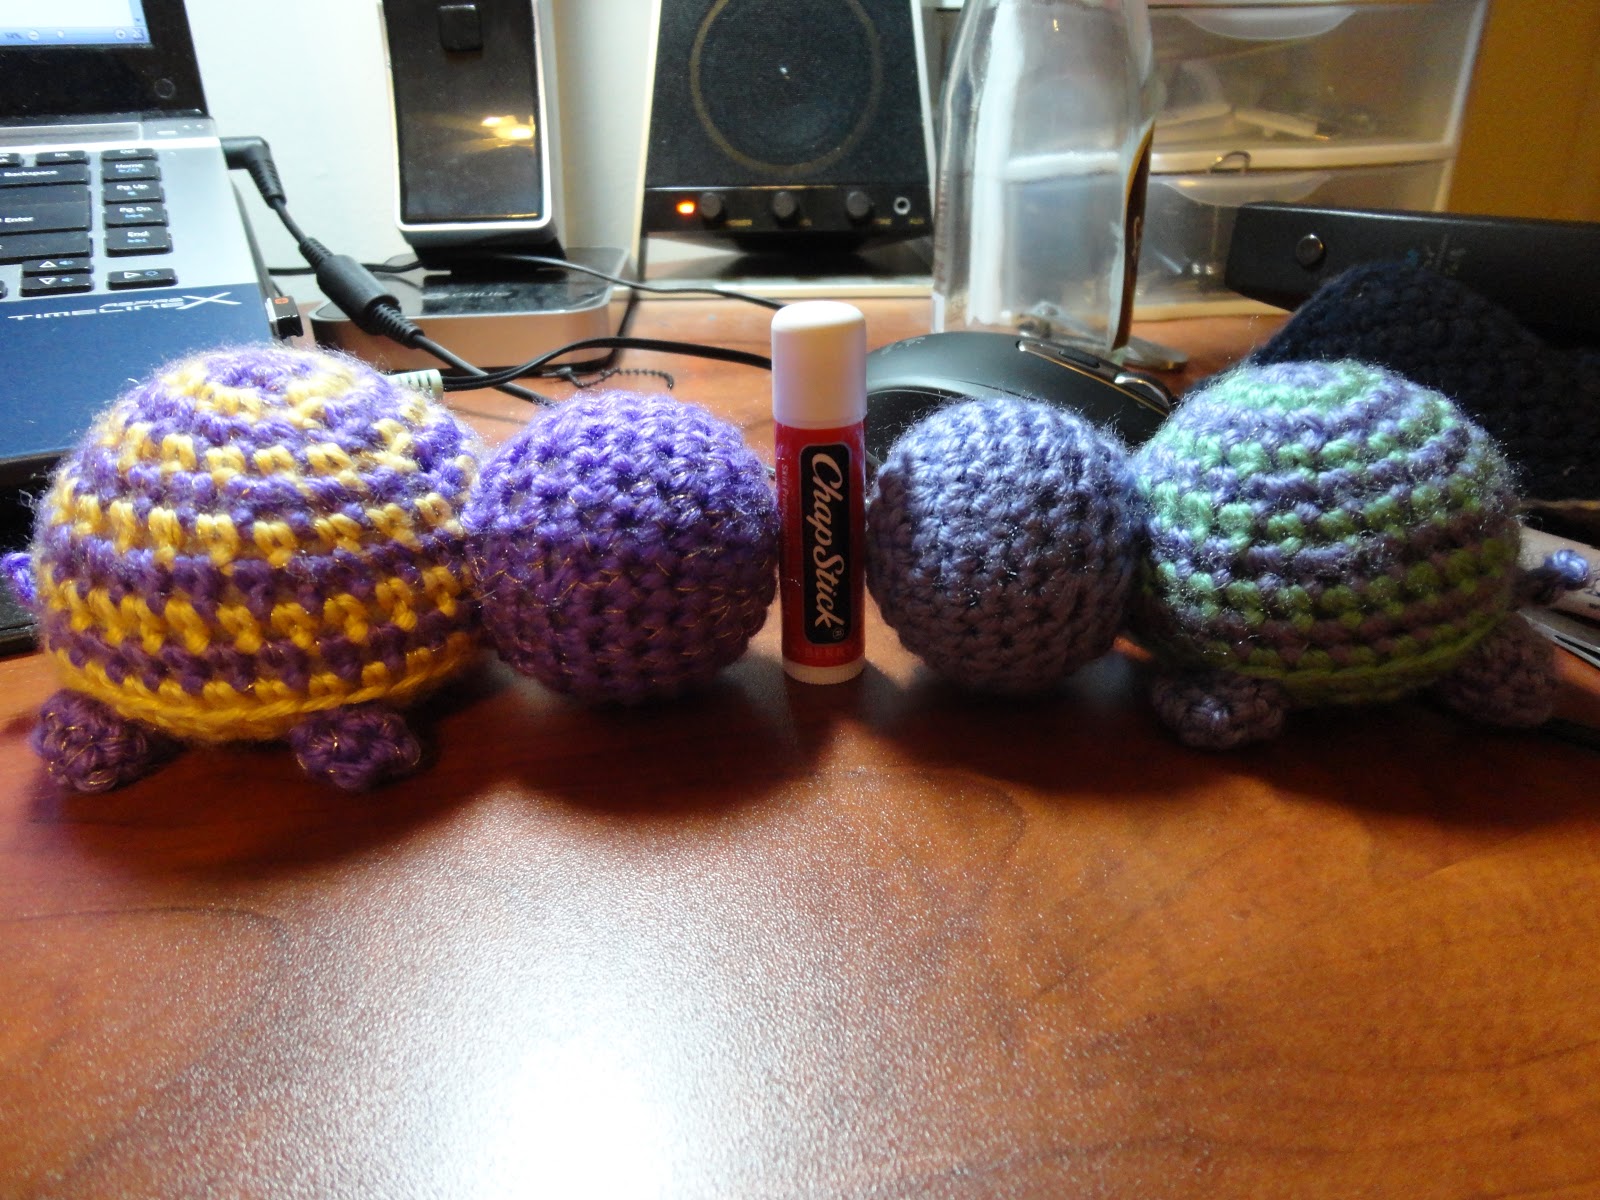
Those were the first two turtles I made out of this "collection". The intent was originally for them to be last year's Christmas presents to some of my friends here at med school.

Clearly that didn't quite work out.

"We're blind!" D:

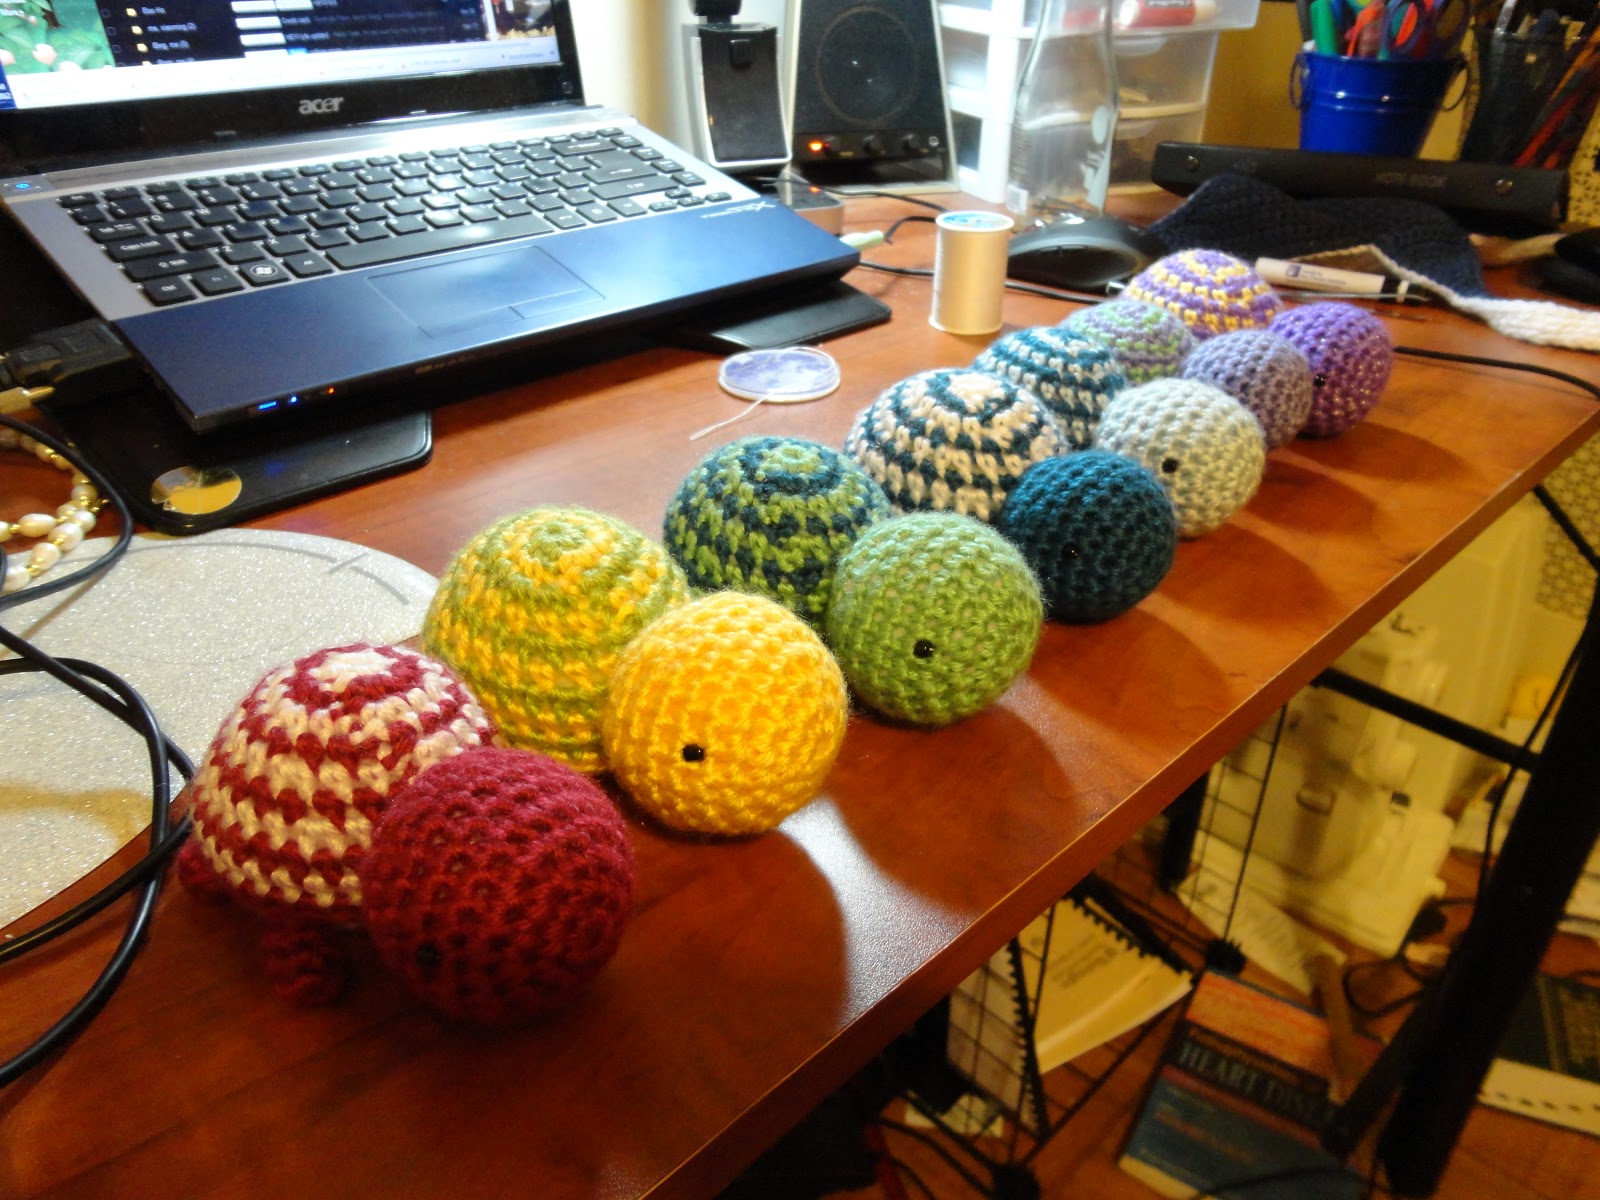
This was their status before I started working on them today. All complete, but eyeless.


A couple episodes of Avatar: The Last Airbender and 14 black seed beads (as seen above) later and...


They are complete!

Note how so many of them are drastically different sizes. Apparently my gauge and stuffing technique can vary by a lot.

These turtles were all made using Caron Simply Soft yarn and an H hook. When stuffing the bodies, I added 5-7 pennies to their tushies to counterbalance their enormous heads.

This turtle was a little different:


You see the gold threads? I took some metallic gold embroidery thread and pulled out a single strand, then crocheted holding that together with the yarn. So this turtle has a little extra sparkle.

Edit: My friends have informed me that this turtle will now and forever be known as Edward. I am passing this information on to you, dear reader.

I can't believe it took me this long to finally get them all done! But now I'm done and so happy. Their adorableness is killing me.


 Thanks for reading, guys!

-Annie

Shared at:

NightOwlCrafting

Tuesday, November 27, 2012

Day 27: Calling it


This is Day 27 of my 30 Days of Commitment (see the other days here), and, sadly, it will be the last.

You may have noticed that there was a laaaaarge gap between this and my last post, and that was (mostly) intentional.

The original purpose of this series was for me to try just committing to something, as part of my experiment in learning how to be an adult. While it didn't quite work out, I've still learned from this experience. In the end, I have things that I prioritize more highly. Sadly, some things that aren't even a high priority for me (like window-shopping the internet for crafting inspiration, as I mentioned in this post) I end up doing before more important things anyways, due to a variety of reasons ranging from laziness to the conviction that "I'll have more time later."

I'm glad I decided to do this series, because it's helped me start figuring out how to make time for the things that really matter. Over Thanksgiving break, I spent hours playing video games and computer games with my brother and shopping with my mother. I could have spent that time blogging, or crafting, or even studying, but in the end, spending time with my family for the first time in three and a half months mattered much, much more.

So, sadly, I won't be able to see this series through. But ultimately, it did serve its purpose. Thanks to those of you who followed me on this short journey.

However, while I won't be posting daily anymore, I will try to make sure to update more frequently. Three months hiatuses are a bit long, don't you think? Let's see if I can at least check in with y'all every week or so.

With that, I have a mountain of studying to get back to! Catch you later!

-Annie

Saturday, November 17, 2012

Commitment Day 17: TV Shows I Love

A tangential note: A comment on my Youtube video for the Forever 21 Knock-Off Scarf brought an interesting point to my attention. The pattern I provide is much more a stitch pattern than it is an actual scarf pattern, at least in my eyes, yet I never named the pattern. I am proposing that we name this stitch the Crossed Clusters Stitch. What do you guys think? Do you have any suggestions for a better name?


Welcome to Day 17 of 30 Days of Commitment!

Today, some classmates and I are getting together to watch a few episodes of one of my favorite shows, Doctor Who. What better day to talk about some of my absolute favorite TV shows?

Read on if you'd like to see! :)

Friday, November 16, 2012

Commitment Day 16: Basketweave


This is Day 16 of my 30 Days of Commitment series. Check out the other posts in this series, too!

Gosh, I'm sorry, guys. This has been another hectic week for me, and I ended up letting this series slide yet again! But then again, this is sort of what the purpose of this whole series was right?

Well, I just go on thinking like that so I don't feel as guilty. ^_~

What I'm sharing with you today is a pretty old project that I never got around to posting. This bag:


A long time ago, I was flipping through a crocheting magazine and was intrigued by a photo of a cross-body purse made using the basketweave stitch. I found this stitch in my book of many crochet stitches, but it's easy to find. A quick Google search brought me to this tutorial, which looks pretty much like what I did.


This was a pretty easy bag to make. I crocheted two panels of basketweave for the front and back, then crocheted one long strip of single crochet to make the strap. I simply single crocheted along the edges to connect them.


A little too late, I discovered an interesting flaw in this design: a crocheted strap will streeeeetch. And mine was already bordering on too long. So after some pondering, I happened upon this solution. Use ribbon!


Basically, I found some ribbon in a coordinating color to stabilize it. The ribbon I found wasn't nearly wide enough, so that line you see going down the middle is where I zigzag-stitched two ribbons together. Once this was done, I simply lined up this ribbon strip along the crocheted strap and sewed down each edge. Voila, problem solved!

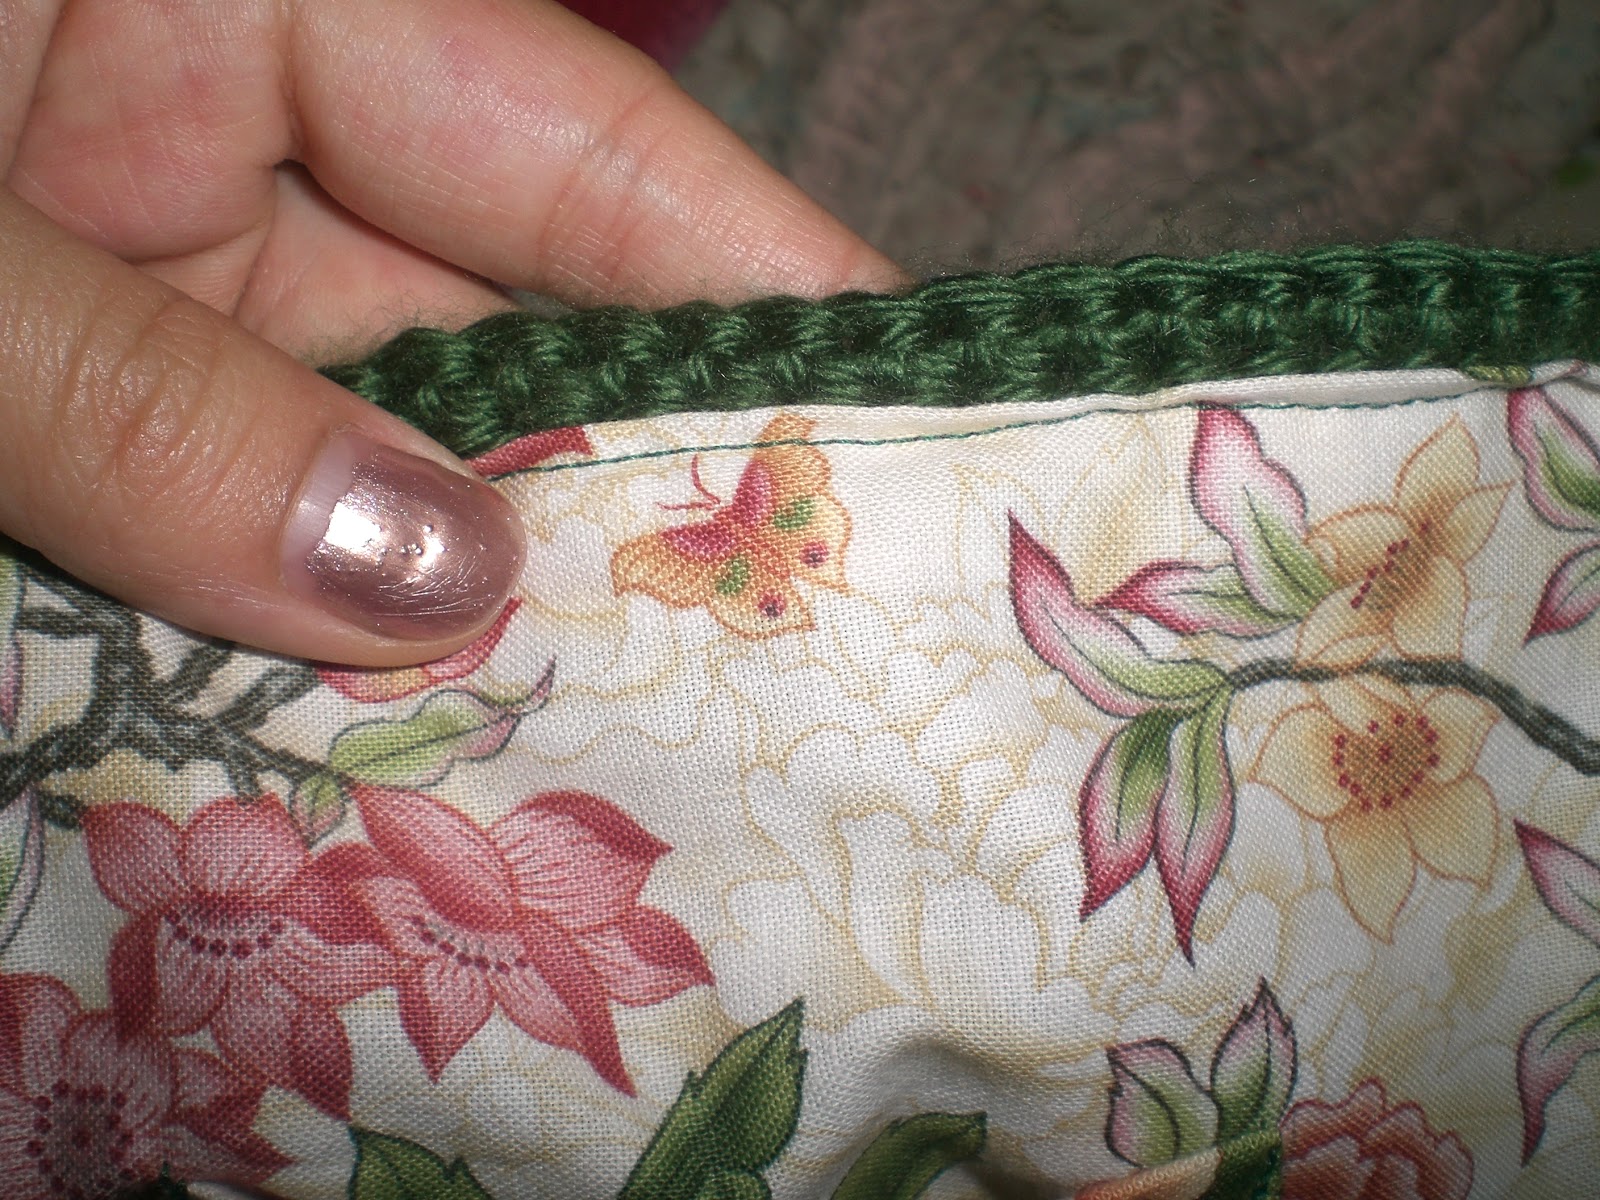
I chose this gorgeous fabric for the lining. The method for making it was similar: cut out two large rectangles for the front and back and then a long, continuous strip for the sides and bottom.


I did, however, add a couple things to the lining. I added three pockets, two cell phone sized and one larger.


I also added a key fob, because I hate having to fish through a big bag for my keys.


There's also a closure strap that can button at two different buttons, depending on how full the bag is.


And to attach alllll of this to the crocheted portion, I slid in the lining, sandwiched the button strap and the key fob between the two layers, and sewed it all together.

Instead of doing the usual thing with lined bags where you flip everything inside out, etc, etc, I simply folded down the edges of the lining and basically topstitched around the edge. Worked out pretty well. :)


So what do you think? I'm pretty proud of this bag. It makes a nice, casual alternative to those days when I'm just not feeling the backpack (my laptop fits in there nicely). 


I hope you enjoyed this post, and I hope you found it inspiring! I enjoy those times when I see something and am able to recreate it myself without relying on patterns. :)

-Annie

Shared at:


Tuesday, November 13, 2012

Commitment Day 13: Storage Solutions - Earrings, Rings, and Watches


Welcome to Day 13 of my 30 Days of Commitment Series! You can find the other posts in this series here.

This isn't quite what I had planned for today; I just found out that I don't have the photos that I thought I did, so that will have to wait. Instead, I'm continuing my series on how I store my oodles and oodles of stuff.

The champion of today's post is boxes. Boxes of any kind. Pretty ones saved from gifted jewelry, or candy, or laying around storing silly things like decorative silverware. Put those boxes to use!

As a recap, here is the "accessories corner" of my room.


When I was China, I saw these wire-framed, straw-wrapped, jewelry-holding doohickeys that I instantly knew I needed. To hang it, I tied a piece of embroidery floss around the wire at either side of the top "petal", then hung the whole thing over yet another Command hook. Don't be fooled, that thing is heavy with so much hanging from it.

But in the end, it really is oh-so-perfect for "hook" earrings.


It's roughly organized between metallics and non-metallics, as well as "big and dangly" vs. "small and delicate". This really helps me when I have an idea of what kind of earrings I want to pair with an outfit and don't feel like searching across this whole spread (it's surprisingly difficult to actually find the pair you want, even in such a small area).


My post earrings all live on the cart in two boxes. This one below holds the "fun" ones, ones that I am more likely to wear in a casual setting. The box itself used to hold one of my silver bracelets that is now hanging on the wall with its brethren.


See the snake one hanging from the lid of the box? That's an ear cuff, and I will definitely be wearing it when the opportunity comes. Super-cool.

Also note how, as much as possible, I try to keep my earrings paired by fastening one of them through the stopper of the other one.


The fancier post earrings I keep in this flower box. Remember the M&Ms teddy bear box from this post? This one also once held M&Ms.


Going clockwise from the bottom:

  • The first compartment holds green-toned earrings. For some reason I have a lot of those.
  • The second compartment holds my earrings that are primarily gold.
  • The next two compartments hold vintage earrings that used to belong to my mom. They wreak havoc on my ears (I have a relatively sensitive nickel allergy) so these are reserved for special, short-term wears.
  • The fifth compartment (it's kind of difficult to see) holds the dangly crystal-and-silver earrings.
  • The sixth compartment holds my crystal and pearl studs. 
  • The center holds any hoop-style earrings. Most of them are actually a perfect fit!
I rearrange these on a regular basis, as my collection changes frequently. Some time soon I will need to go through my earrings and put away the ones I don't usually wear.

Moving on to rings!

This box used to be just a box, and I would throw my rings in it willy-nilly. I finally decided I had enough and actually turned it into a real "ring box."

See the ribbon-like one on the bottom left?
My favorite ring, hands-down.

It was a very easy and fast project. With some white fleece, I cut out a rectangle about as wide as the box and at a length that I knew was too long. I rolled it up until the roll was the size I wanted and cut off the excess, then used that rectangle as a pattern for more pieces to cut and roll up. I just kept cutting out and rolling rectangles until the box was filled. Then, it was a simple matter of sliding my rings in, sorted, of course, by the base metal.

I used another box for my watches. Someday I may devise some dividers or something to keep them better sorted, but for now, this works fine. I have a bunch of other watches that either don't suit my taste (again, passed down from my mom), are broken, or have no battery in another box hidden away in the drawer.


Hope you enjoyed this installment of my Storage Solutions! Eventually you'll get to see what I do to store my other accessories, clothes, and crafting stuff. Hope you're looking forward to it as much as I am!

-Annie

Shared at: