Wednesday, March 25, 2015

Earring Organization

Well, well, well. One year without posts and here I am, breaking the streak.

Lots has been going in life, obviously. I'm finishing up medical school this May and finally going to be a DOCTOR. I start my training in Pediatrics this summer! In less than two months, I'm also GETTING MARRIED to truly the best man I know (and there will be a little DIY coming with that, believe you me).

But this is about crafting!

I just wanted to share this with you guys because I've never seen earrings stored quite like this. Putting chicken wire, or lace, or burlap in frames never really worked for me. They were all a bit too rustic, for lack of better words, for how I like to decorate.

I do, however, have a few of these scrolls hanging in my apartment:


It hit me when I saw these that I could imitate this style.

One trip to Michael's later and....


Pretty, no? I have been using this system for almost two years, and it's held strong for me. Hooks go near the top, hoops go on the edges (they of course also work really well on the bottom, and studs go near the bottom for easy unhooking.

Here's a slightly closer look at the top edge:


Also, this was almost laughably easy to make. I found a nice long piece of Aida cross-stitch canvas, a dowel (about 3/8" in diameter I believe), and red embroidery thread.

First I cut the dowel into two lengths, for the top and bottom. I pre-measured how many rows of canvas would be enough to make a casing for the dowels, then I back-stitched it in to emulate the look of a scroll. At the top, I also added a loop to hang it from.

Choose a spot, hammer in a nail (or hang a Command hook, whatever floats your boat), and put your earrings in. Done!

Thanks for reading, especially to those of you who used to follow my blog and remained faithful followers! Hopefully I'll poke my head in again soon to share some of my wedding DIYs with you!

- Annie

Wednesday, December 11, 2013

A Little Holiday Spirit

As always, it's been a quite a while since my last post. I hope I find you all well and in the midst of a lot of holiday excitement!

My year, suffice to say, has been extremely busy. Without spending too many words on it, I'd just like to say that this is probably the most challenging time of my life, although it can also be incredibly rewarding. Third year of medical school is exhausting but also fun at times! If anyone is interested in a post talking more about what my year and experience has been like, I'm happy to share, but otherwise, I'm keeping this more in the spirit of a crafting blog.

And despite the demands that have been put on me this year, I have still managed to find a little time here and there for crafting! Shocking, I know. I'm hoping there will be time later on to share my other projects, but it'll just be one today.

So I moved recently, and my living situation now is such that I know I'll be here for at least two years. That is the only explanation I can come up with to explain why I had a sudden urge to actually put up any sort of Christmas decorations this year. Something about the slightly more permanent living situation made me want to "take ownership" of my apartment in some way. Somehow, putting up seasonal decorations does that for me, I guess, even though I've really never been a "holiday spirit" kind of girl!

I had originally thought that I wanted to craft those little cone-shaped Christmas trees you're seeing everywhere, or maybe crochet up an adorable Christmas lights garland. We don't really have the space to store a large amount of seasonal decorative stuff, so I was thinking small.

However, I had also noticed that a lot of our neighbors are putting up Christmas wreathes. And somehow deep down inside, I felt this "keeping up with the Joneses" sense of inadequacy suddenly well up, and then I decided right there to make a wreath for our door!

A quick trip to Michael's and an hour or two later and....


Ta-da! Isn't it cute?


All it took was a foam wreath form, a couple tinsel garlands I bought last year (whoooo, post-seasonal clearance!), some ribbon, a decorative little "sprig", and some wire.


A foam wreath form is a great base because it's so easy to get stuff to stay in. Simply use some wire (you can use the "U-shaped" floral pin things, unbent paper clips, even some nice heavy staple gun staples) to anchor the ends of your tinsel and wrap, wrap, wrap. Make sure it's luxuriously dense and fluffy!

When you're done with that, wrap your ribbon around, anchoring it in a similar way. Don't wrap it too tight or you'll crush the tinsel, and that just looks weird.

I made a bow by hand by making three larger loops, then using the central loop to cinch them all together. The nice thing about a lot of crafting stores is that they'll have bows coordinating with a lot of their holiday ribbons premade for you if you don't feel like making one on your own. Either way, pin the bow onto the wreath as well.

As for the green "sprig", all I ended up doing was stab the stem into the form as well. Seriously, foam is magic, I love this stuff.

Lastly I created a hanging loop with a longer piece of wire bent into a U. I found the point that I wanted to be the top of the wreath and starting poking the ends of the U into the foam, pointing it upwards. When the wire was about halfway in, I then bent the remaining exposed wire up to create a simple loop.

Et voila, you are done!


The sparkling in these images makes me ridiculously happy. :) And we now have an adorable wreath and I no longer feel drab next to our neighbors!

I've seen a lot of very creative wreath ideas out there. Ornament wreathes, crocheted wreathes, succulent wreathes, yarn-wrapped, burlap, pompom, the list goes on and on. Have any of you created your own wreathes? Anyone have other fun ideas with what you can do with a tinsel wreath as a foundation?

Happy holidays! Hopefully you will hear from me again soon!

Thanks for reading!

-Annie

Shared at:

Sunday, June 16, 2013

Another beginning

I survived! The deed is done, the battle is fought, and the brave soldier has come marching home. My test is done, and now the third year of medical school begins.

I realize in my head that it's a little silly to wait "until a good time" to start on new goals, or even to think that beginnings (like New Year's, or the beginning of a school year) are necessarily "the time" to set new goals. But I guess at times like these, we're really looking to the future, and that brings to mind all these things we want to change and accomplish. So, on the brink of starting a new year, I looked back, looked ahead, and came up with a little something that I hope I can use to guide me through the next year.

Things to Be in the Coming Year:

1) Loving 
As a girlfriend, daughter, sister, friend

2) Consistent
Maintain a journal for once!

3) Unplugged
Stop wasting so much time on the Internet

4) Creative!
Keep on crafting

5) Active
Try to get exercise

6) Healthy
(especially since I'll be guzzling so much heavily sugared and creamed coffee)

7) Frugal
Watch that budget

8) Kind
In the sense that I need to be kinder to myself and stop being so negative

9) Tidy
Actually maintain cleanliness, not just in big cleaning purges

10) Punctual
Professionalism matters even more this year

11) Studious
Because cramming is the worst thing ever

12) Engaged
Show interest, get involved, ask questions

What about you guys? Are there goals or resolutions you have set for yourself? How do you go about sticking to them? 

Thanks for reading!
-Annie

Tuesday, June 4, 2013

Tape and Smartphones

Hi all!

Test day will be upon me very very soon. At this stage it's reached the point where I really just want it to be over and done with. Soon!

Just a quick post to show off what I do with some of my breaks. 

I assume by now that most of you are familiar with washi tape. I thought it was cute, but kind of silly to blow money on...but really, this stuff is super fun. :D

First, in the course of studying, I wanted bookmarks. It just so happened that I had rediscovered How About Orange (super-fun blog, highly recommended!) and found this tutorial for a heart-shaped corner bookmark.

Whipped up two super-quick with some notebook paper I had on hand. Unpleasant surprise: they didn't stay flat and folded as well as I had hoped. And of course they weren't exactly pretty. But with a little tape to hold things together...


Cute! Far from perfect, you can even see the notebook paper lines on the chevron one, although I do think it's cool that the lines almost matched the peaks. :)

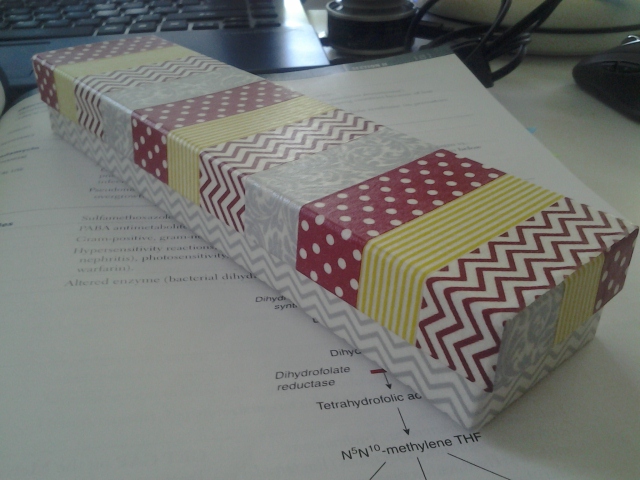
It just so happens that I had recently found this tutorial for a washi tape-covered box, and even had one of those white necklace boxes just laying around. So when I had a mini-meltdown around lunch, I did this to cool myself off:


Prettified!

The rest of my possessions had better watch out, they're about to get WASHI'ED, muahaha!

Final note before I toddle back to my flashcards: did everyone else already know that there's a Blogger smartphone app? All you have to do is search Blogger in your app store and it comes up!

To tell the truth, I could immediately tell that there would be some problems with it. You don't have a lot of freedom in formatting on the phone, and I find typing on my phone downright annoying sometimes. But the reason why I got the app was that now, I can take pictures on my cell phone and immediately upload them and save as a draft! No more excuses! No more waiting until I've charged my camera or found the energy to connect my phone to the computer and upload photos!

Maybe this will up my posting frequency, who knows? I love technology, guys. :)

Welp, that's it for now! Until after Step 1, my friends!

-Annie

Monday, May 20, 2013

Magic

Hi all!

Brief update on life: I'm currently immersed in cramming for USMLE Step 1, which any American medical student will tell you is one of the most (if not THE most) important standardized exams of my life.

Not only does it test pretty much ALL the knowledge I theoretically gathered over two years of medical school, but the score on this exam matters a ton for where I eventually do my residency (essentially my paid training years). For those of you who are unfamiliar with the system, I will literally be taking exams for the rest of my life, and they will arguably be harder than this one. But the kicker is that for those later exams, I only have to pass. I don't have to worry about elbowing my way through the percentiles amongst thousands of extremely intelligent peers for a score that could determine the future of my career.

So. A little stressed. I hope you all forgive me for the long hiatuses. Also, soon after, I will be beginning third year. Which is...sort of like an apprenticeship, is the best way it can be described. I'll be busy and tired, but I will have free time (I just don't really get to choose when that free time is...). Hopefully I'll be able to bang out a little more crafting time next year. We'll see. If all goes well, you might even get a short post about  my mom's Mother's Day gift within the next couple weeks!

And now for the title. In the years that this blog has existed, I have always regretted that I couldn't directly reply to comments, especially when publicity on my infinity scarf took off and people kept coming back with questions. I tried to the edit the post itself to answer their questions, but many of those people never got direct answers because I couldn't figure out how to enable the "Reply" function.

It shames me as a member of the generation that grew up alongside Google that it took me this long to simply look up how to do it. And I found it. It was so easy. Straight from Blogger Help itself, this is how you enable the Reply  function in your comments section. Freaking magic.

I hope that helps someone else as much as it helped me. And now, back to studying.

-Annie

Tuesday, April 30, 2013

Statement Necklaces

Happy almost-May! I hope you all are well!

I've wanted to foray into jewelry-making before (anyone remember these?), but I was a bit limited by lack of tools and lack of inspiration.

Crafting confessions: I almost never wore either of these pieces. There are some times when you make something and you're just super-proud, but then a few days later you look again and realize it's...not that great. We've all been there.

But I'm actually reasonably certain that the necklaces I made this time will continue to be used! Score one victory for me!

The first I made was based on this tutorial. Absolutely gorgeous. I'd previously gone to Michael's and arbitrarily bought a couple strings of beads, being too silly to try and figure out how many I actually needed. Turns out, I had only purchased about half of what was necessary. But no matter, let's just shrink it down!

Shock and amazement, it actually turned out super pretty. (apologies for sad quality photos)


This used 28 beads instead of the 55 called for in the tutorial.

I was a little intimidated by having to use eye pins and head pins for the first time, but it was surprisingly easy. I need to get a second pair of pliers though. Pinching on to those jump rings kills the fingers!

The second necklace began as one of these super cheap "pearl" necklaces I'd bought for a buck each:


Using this tutorial as a guide, I started adding on a bunch of individual and doubled up beads (one head pin even has 3 beads on it...still deciding if I like it or not). Et voila!


So I'm pretty happy!

And then inspiration struck! Who ever said that even statement necklaces need to be worn alone?


I actually really like this combination, and I fully intend to wear these necklaces together someday! What do you guys think? Is this something you would try?

If any readers have been teetering on the fence about experimenting with jewelry-making, I totally recommend it. It's a lot easier than I was afraid it would be. Just make sure you have the right tools. :)

I'd love to hear any thoughts, opinions, and advice! Please share!

Thanks for reading!

-Annie

Thursday, March 7, 2013

One more for the bucket list: Cosplay!

Hello again!

I once more have something crafty to share with y'all, and I'm actually super proud of it. This is my first cosplay! I have always wanted to do it, and now I can finally say that I have!

Now cosplay is essentially dressing up as a character or even things from books, TV shows, movies, etc. It's pretty popular at anime and other types of conventions. However, when my friends and I decided to cosplay, we did it for school.

Sort of. You may be surprised to learn that medical school isn't always "study study study". We have time for fun things, like our belated Lunar New Year Festival that just happened last Saturday. It consists of acts performed by medical students, undergrad students, and some of the other schools on our campus (PT, OT, audiology, etc) putting together acts to perform for fellow students, faculty, and really anyone else we care to invite.

One of these acts that I participated in was a dance inspired by Avatar: the Last Airbender and The Legend of Korra (I talked about them in the post about my favorite TV shows). Any fans here?

Quick introduction for those who are not familiar with the Avatar universe: in this world, some people are born with the ability to manipulate ("bend") one of the four elements: air, water, earth, and fire. The Avatar is the lone person in the world who can bend all four. Bending is commonly used in combat, so in the TV show, the animation of each type of bending is based off of a martial art.

In this dance, we correlated each of the elements with a dance style. Water was more lyrical, earthbending was step, fire was hip-hop-ish, and air was breakdancing. Two of my friends (and fellow Avatar fans) who were in the dance with me decided, "What the hey, we're gonna cosplay this!" Water, fire, and earth all have one major female character associated with them, so we went as Katara, Azula, and Toph, plus an Aang!

BUT! I'm the only one of us three (four, if you included our airbender, who we roped into cosplaying with us) who can sew. I have made from scratch a grand total of three real garments for myself: this shirt and two pairs of PJ pants. This was my first time using darts, an invisible zipper, interfacing, and inset sleeves.

But hey! Two weeks, four costumes, almost no experience? On top of rehearsals for three different acts for the Lunar New Year Festival and schoolwork? Totally doable!

That sounds sarcastic. And you know what? It was hard...but I did it! And we looked fantastic!


Sadly, our airbender had to leave the performance early, so no group picture with him. :(

Some of my preliminary doodles (with the measurements blanked out, for obvious reasons):


See more photos of the costumes after the cut!

Tuesday, January 15, 2013

A Braided Scarf with Extra Glitz

Hi guys! I hope you all had a fantastic holiday season! I had a fun break, and I'm doing my best to stay on track with schoolwork and working out this year. To those of you who make New Year's resolutions, or who (like me) are constantly trying to turn over a new leaf and change for the better, I read this interesting article about how to stick to your goals. I don't know how well it works, but it's certainly worth a try!

So for this block of classes, one of my goals was to maintain attendance at my lectures. They aren't required, but my theory is that if I go to them instead of watching the video recordings afterward, I might manage my studying a bit better. Going along with that, I have also been trying to dress nicely for my classes. Some days I really only have time for the T-shirt, sweater, and jeans routine, but most days I have more time for a more "special" outfit, and it's part of today's outfit that I wanted to share with you.

This braided scarf concept has been circulating around the internet for quite a while. I really love wearing it this way and have shown it to a lot of my friends. I won't bother with a tutorial since the link already explains it perfectly well, but I just wanted to share a some inspiration for jazzing it up a little.

So today, I was planning on tying a brown silk scarf in a braid, but it lacked something. I realized that I was wearing these gold hoop earrings (they are not in the photos, as by the end of the day my allergies had started acting up and necessitated removing them), and I really needed a little more sparkle for a cohesive look.

And what did I reach for? A simple gold necklace. A little weaving and ta-dah!


(One of these days, my room will be clean and I will not be ashamed to have a wider frame in my photos. >_>)


It came out looking pretty darn cool, and it was very easy to do.


I simply unclasped the necklace and fed most of the chain through a loop at the very bottom of the braid. Leaving a very short portion dangling, I wove the chain through the braid, looped it behind the braid at the top, and wove it back down again along a different strand. Then all I had to do was refasten the chain at the back of the bottom of the brain and pow! Instant glitz!


So for those of you who find that the fancy scarf braid isn't fancy enough, give this a shot! Use a pretty chain, or maybe a string of beads or pearls. And of course, try this with other scarf-tying methods, too! It could really turn your scarf into something extra-special.


This braid and a mock men's tie (as shown above) are probably the ways I most commonly wear "fashion" scarves as opposed to scarves worn for warmth.

How do you guys like to wear your scarves? Would you try what I did with my braided scarf?

Thanks for reading!

-Annie

Tuesday, December 4, 2012

Coming out of my shell...

Guess what I've been up to since my last post?


TURTLES!!!


I posted way back when about all the turtles I had made previously using the Tiny Striped Turtle pattern.


Since then, you may vaguely recall a post last from earlier this year with this picture:


Those were the first two turtles I made out of this "collection". The intent was originally for them to be last year's Christmas presents to some of my friends here at med school.

Clearly that didn't quite work out.

"We're blind!" D:

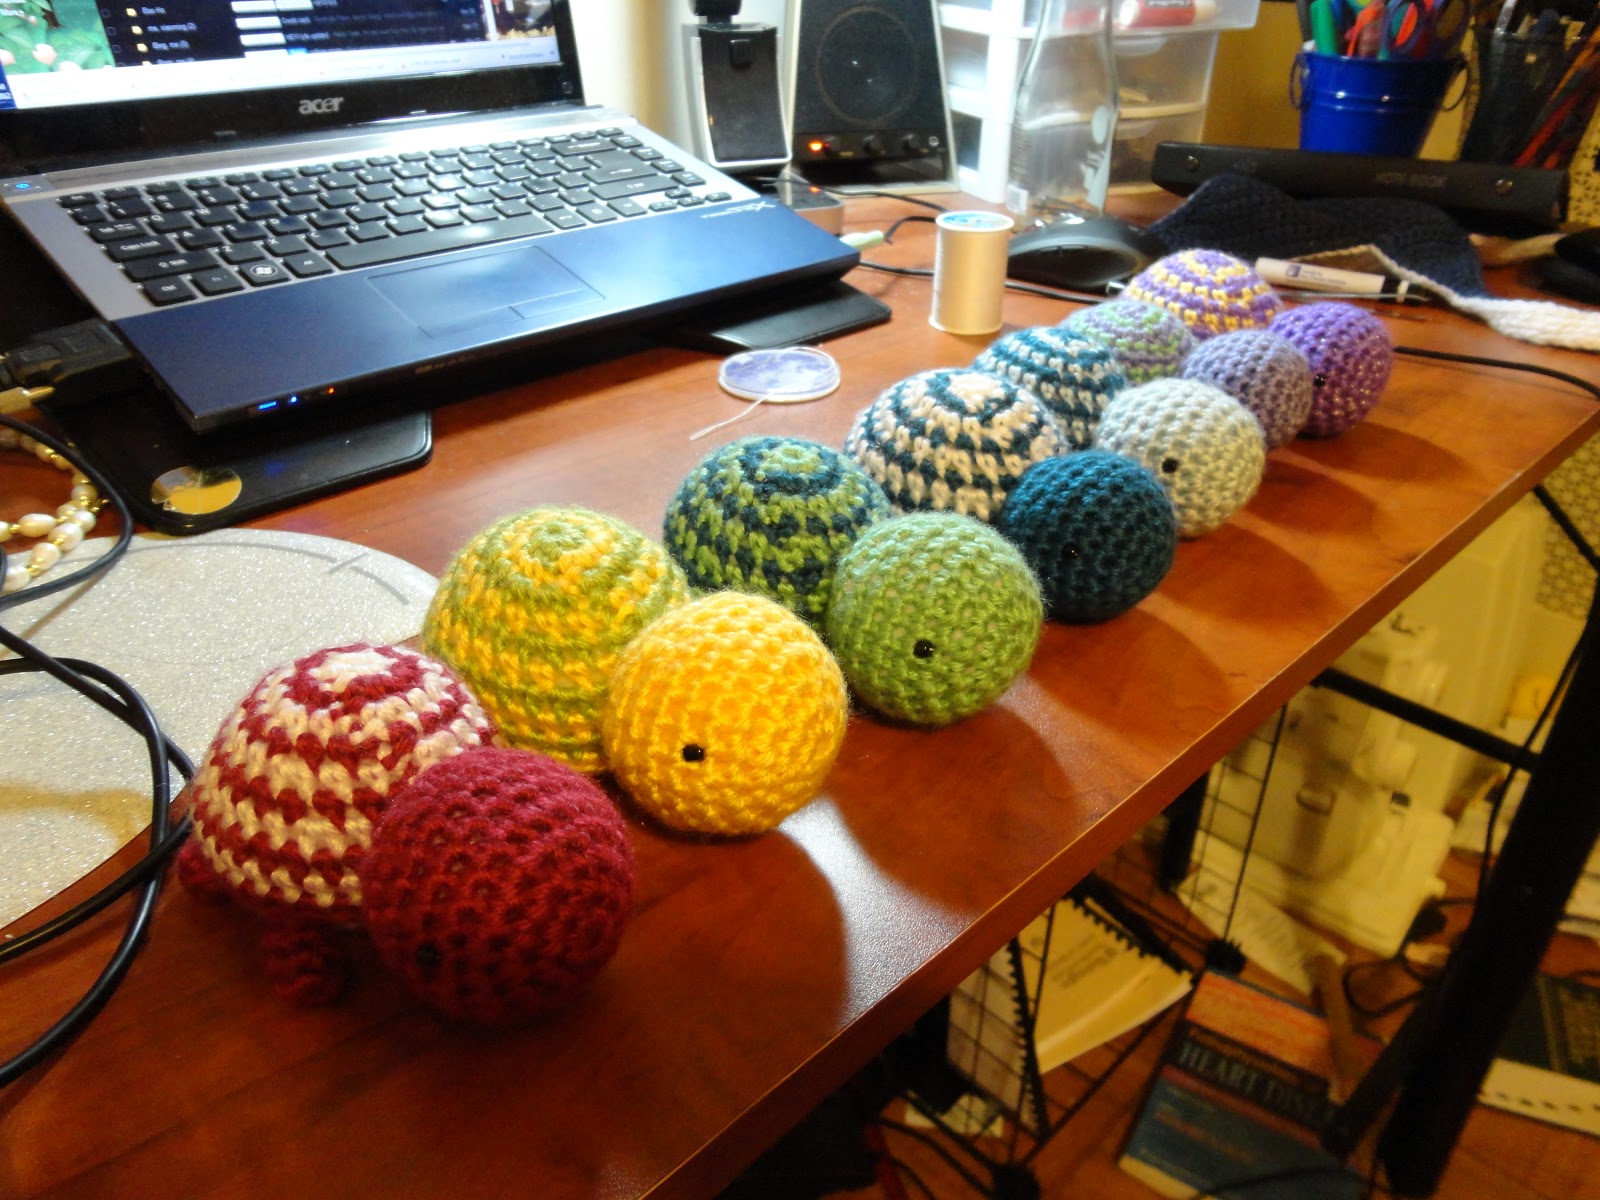
This was their status before I started working on them today. All complete, but eyeless.


A couple episodes of Avatar: The Last Airbender and 14 black seed beads (as seen above) later and...


They are complete!

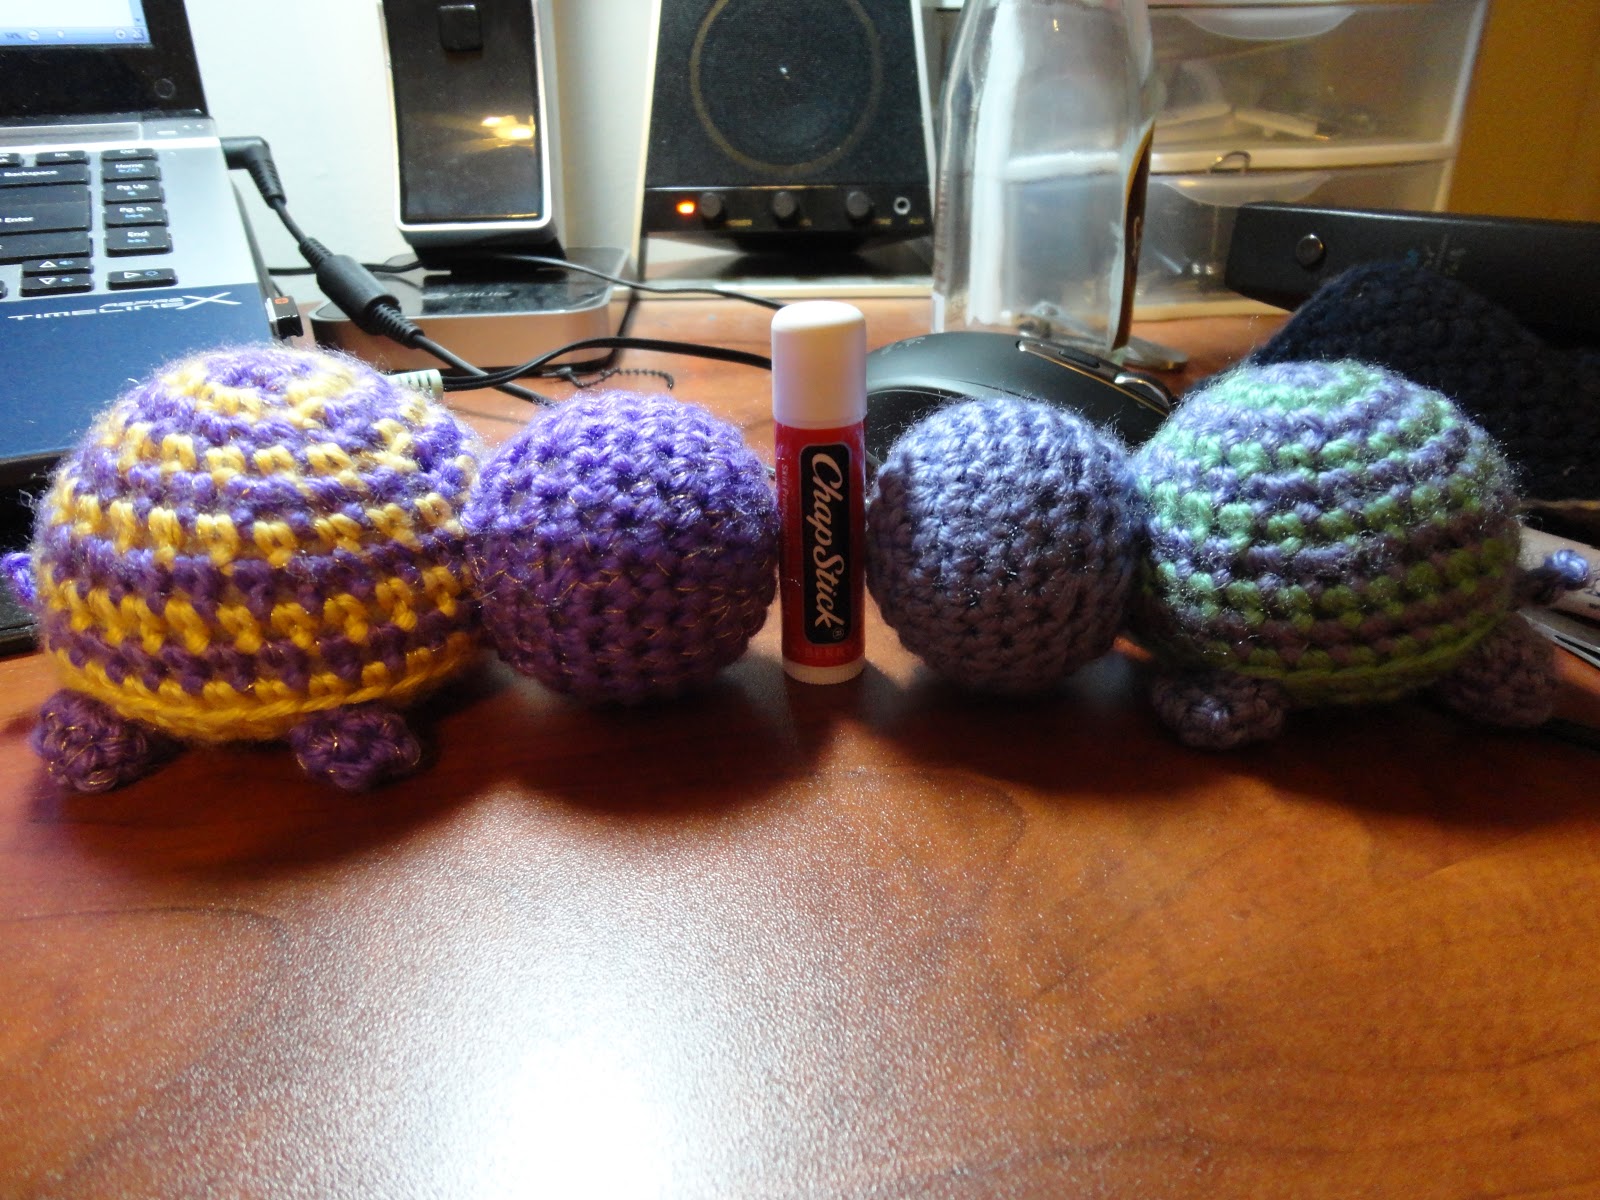
Note how so many of them are drastically different sizes. Apparently my gauge and stuffing technique can vary by a lot.

These turtles were all made using Caron Simply Soft yarn and an H hook. When stuffing the bodies, I added 5-7 pennies to their tushies to counterbalance their enormous heads.

This turtle was a little different:


You see the gold threads? I took some metallic gold embroidery thread and pulled out a single strand, then crocheted holding that together with the yarn. So this turtle has a little extra sparkle.

Edit: My friends have informed me that this turtle will now and forever be known as Edward. I am passing this information on to you, dear reader.

I can't believe it took me this long to finally get them all done! But now I'm done and so happy. Their adorableness is killing me.


 Thanks for reading, guys!

-Annie

Shared at:

NightOwlCrafting

Tuesday, November 27, 2012

Day 27: Calling it


This is Day 27 of my 30 Days of Commitment (see the other days here), and, sadly, it will be the last.

You may have noticed that there was a laaaaarge gap between this and my last post, and that was (mostly) intentional.

The original purpose of this series was for me to try just committing to something, as part of my experiment in learning how to be an adult. While it didn't quite work out, I've still learned from this experience. In the end, I have things that I prioritize more highly. Sadly, some things that aren't even a high priority for me (like window-shopping the internet for crafting inspiration, as I mentioned in this post) I end up doing before more important things anyways, due to a variety of reasons ranging from laziness to the conviction that "I'll have more time later."

I'm glad I decided to do this series, because it's helped me start figuring out how to make time for the things that really matter. Over Thanksgiving break, I spent hours playing video games and computer games with my brother and shopping with my mother. I could have spent that time blogging, or crafting, or even studying, but in the end, spending time with my family for the first time in three and a half months mattered much, much more.

So, sadly, I won't be able to see this series through. But ultimately, it did serve its purpose. Thanks to those of you who followed me on this short journey.

However, while I won't be posting daily anymore, I will try to make sure to update more frequently. Three months hiatuses are a bit long, don't you think? Let's see if I can at least check in with y'all every week or so.

With that, I have a mountain of studying to get back to! Catch you later!

-Annie

Saturday, November 17, 2012

Commitment Day 17: TV Shows I Love

A tangential note: A comment on my Youtube video for the Forever 21 Knock-Off Scarf brought an interesting point to my attention. The pattern I provide is much more a stitch pattern than it is an actual scarf pattern, at least in my eyes, yet I never named the pattern. I am proposing that we name this stitch the Crossed Clusters Stitch. What do you guys think? Do you have any suggestions for a better name?


Welcome to Day 17 of 30 Days of Commitment!

Today, some classmates and I are getting together to watch a few episodes of one of my favorite shows, Doctor Who. What better day to talk about some of my absolute favorite TV shows?

Read on if you'd like to see! :)

Friday, November 16, 2012

Commitment Day 16: Basketweave


This is Day 16 of my 30 Days of Commitment series. Check out the other posts in this series, too!

Gosh, I'm sorry, guys. This has been another hectic week for me, and I ended up letting this series slide yet again! But then again, this is sort of what the purpose of this whole series was right?

Well, I just go on thinking like that so I don't feel as guilty. ^_~

What I'm sharing with you today is a pretty old project that I never got around to posting. This bag:


A long time ago, I was flipping through a crocheting magazine and was intrigued by a photo of a cross-body purse made using the basketweave stitch. I found this stitch in my book of many crochet stitches, but it's easy to find. A quick Google search brought me to this tutorial, which looks pretty much like what I did.


This was a pretty easy bag to make. I crocheted two panels of basketweave for the front and back, then crocheted one long strip of single crochet to make the strap. I simply single crocheted along the edges to connect them.


A little too late, I discovered an interesting flaw in this design: a crocheted strap will streeeeetch. And mine was already bordering on too long. So after some pondering, I happened upon this solution. Use ribbon!


Basically, I found some ribbon in a coordinating color to stabilize it. The ribbon I found wasn't nearly wide enough, so that line you see going down the middle is where I zigzag-stitched two ribbons together. Once this was done, I simply lined up this ribbon strip along the crocheted strap and sewed down each edge. Voila, problem solved!

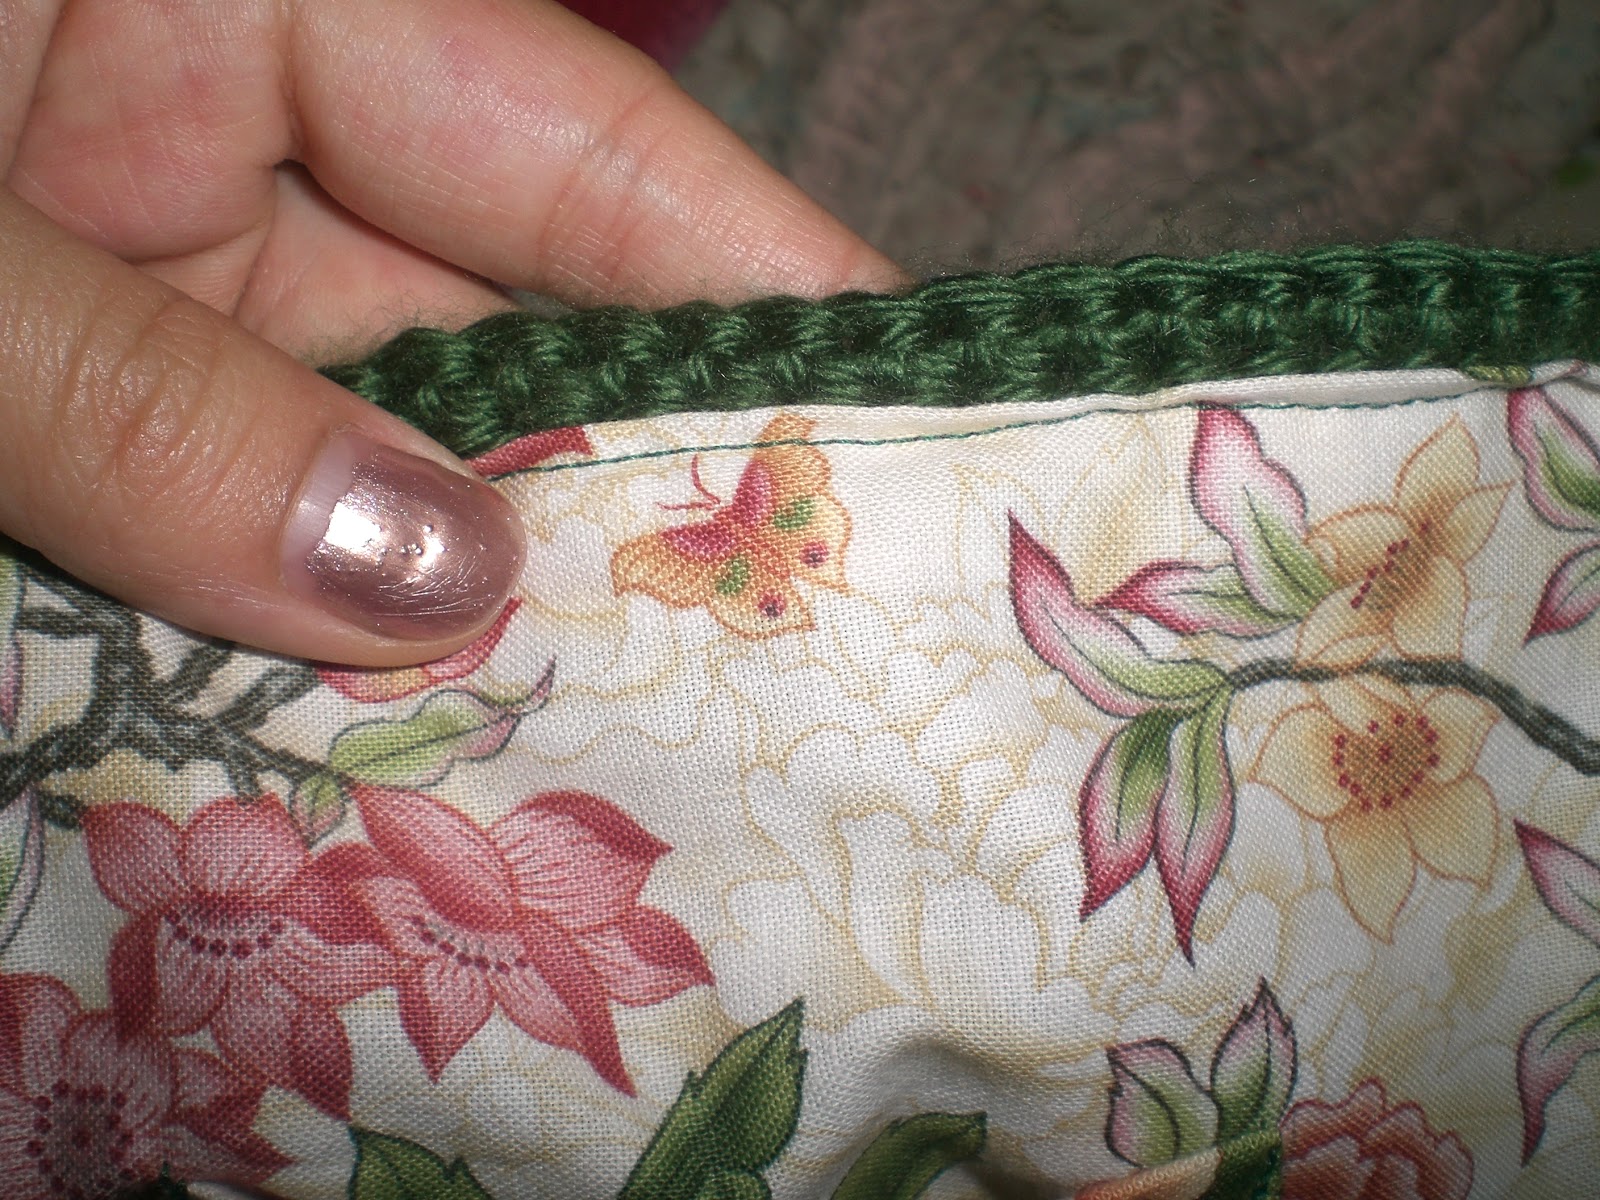
I chose this gorgeous fabric for the lining. The method for making it was similar: cut out two large rectangles for the front and back and then a long, continuous strip for the sides and bottom.


I did, however, add a couple things to the lining. I added three pockets, two cell phone sized and one larger.


I also added a key fob, because I hate having to fish through a big bag for my keys.


There's also a closure strap that can button at two different buttons, depending on how full the bag is.


And to attach alllll of this to the crocheted portion, I slid in the lining, sandwiched the button strap and the key fob between the two layers, and sewed it all together.

Instead of doing the usual thing with lined bags where you flip everything inside out, etc, etc, I simply folded down the edges of the lining and basically topstitched around the edge. Worked out pretty well. :)


So what do you think? I'm pretty proud of this bag. It makes a nice, casual alternative to those days when I'm just not feeling the backpack (my laptop fits in there nicely). 


I hope you enjoyed this post, and I hope you found it inspiring! I enjoy those times when I see something and am able to recreate it myself without relying on patterns. :)

-Annie

Shared at: